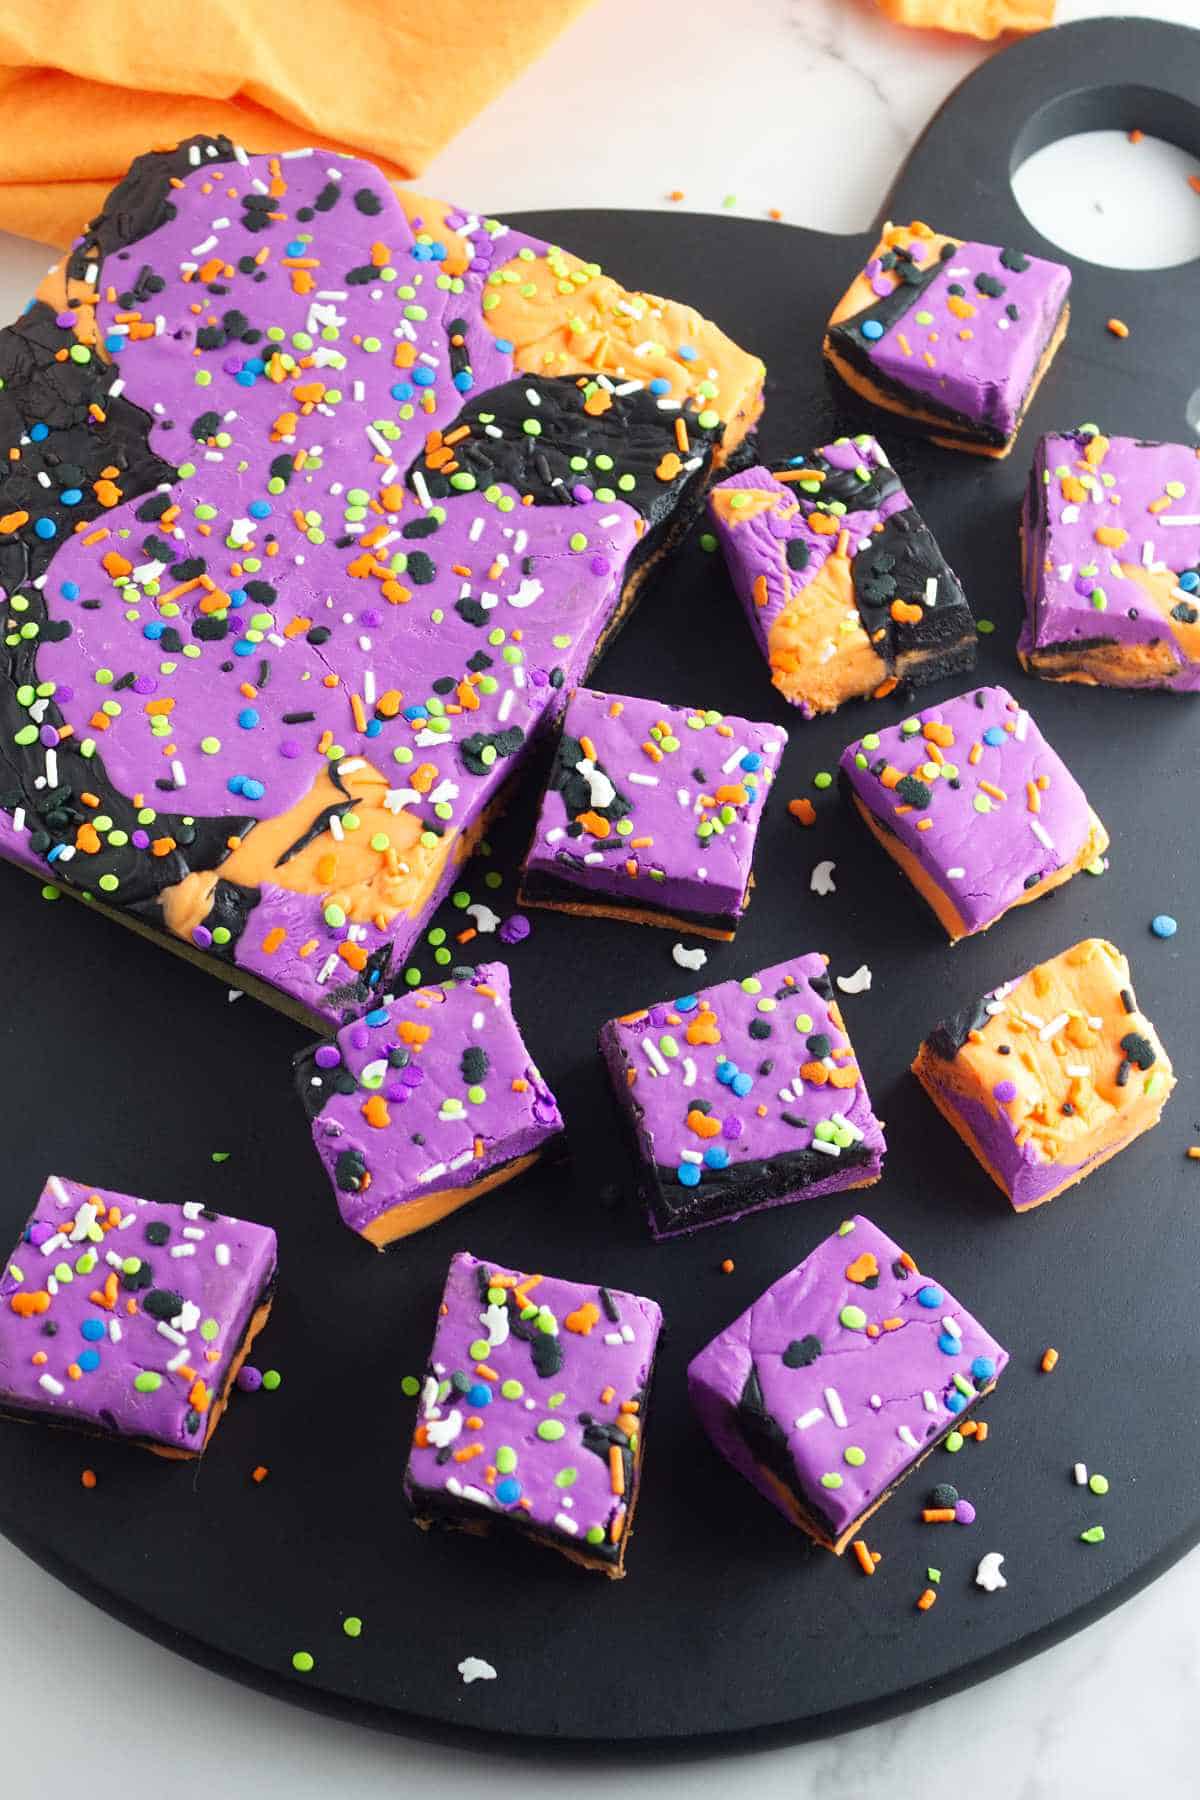
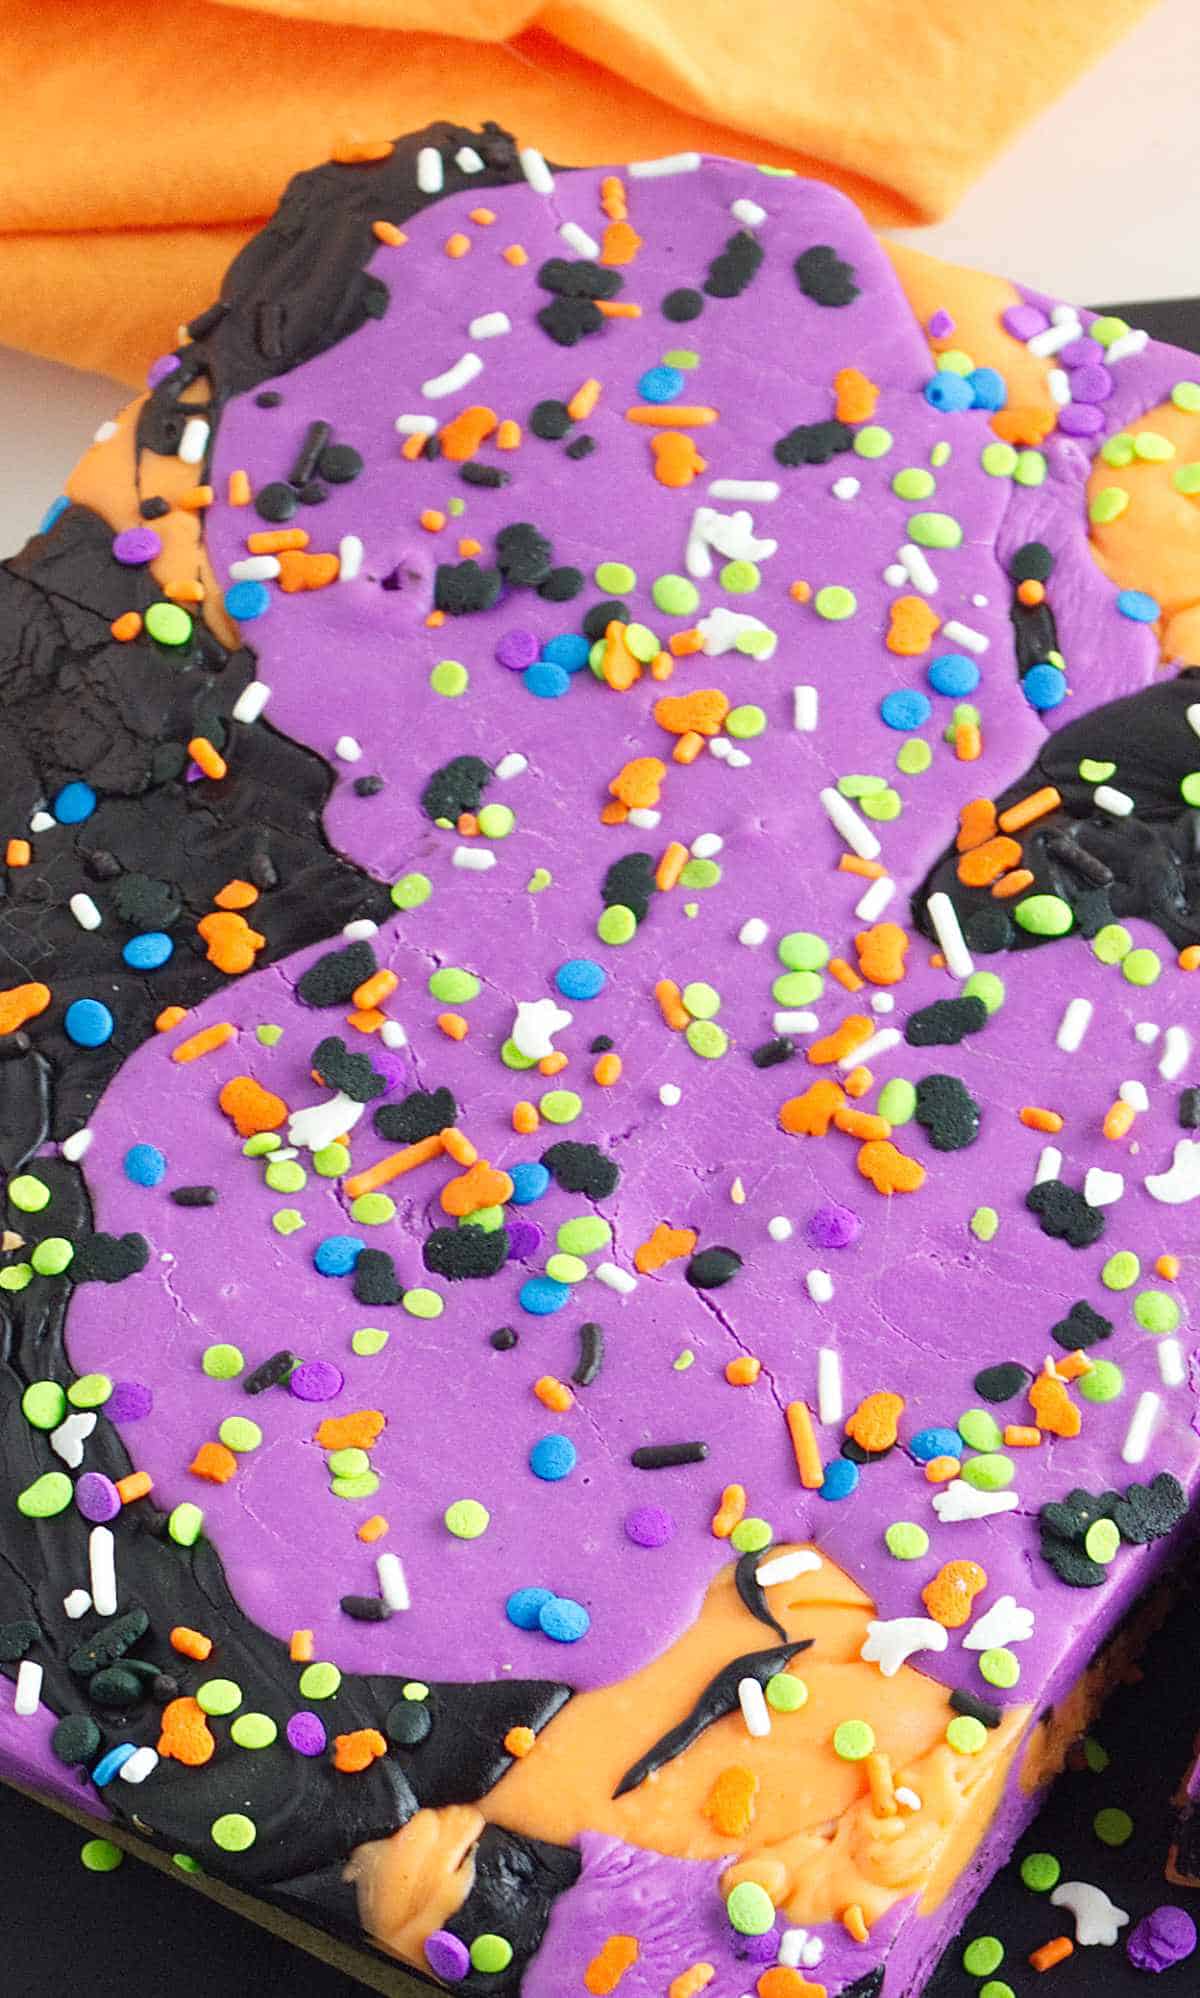
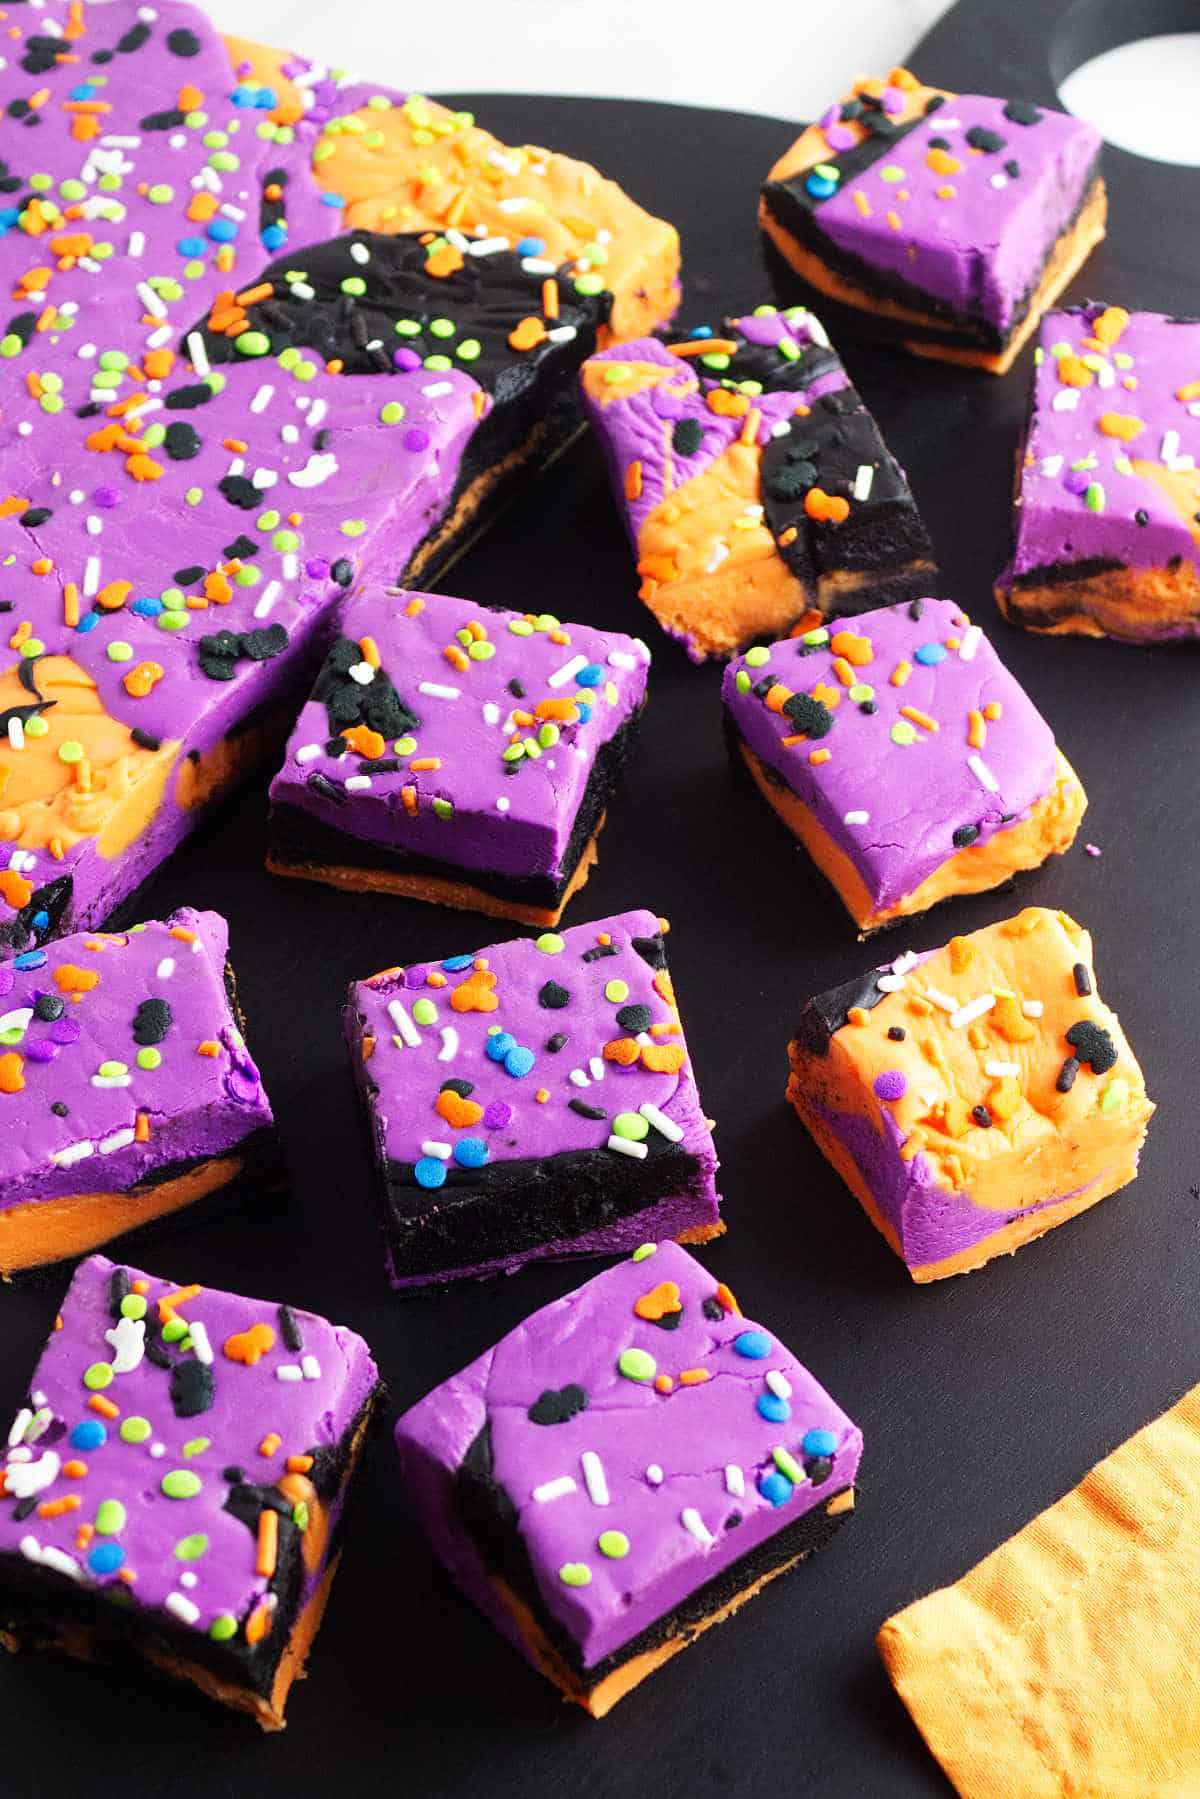
This easy melt-and-pour Halloween Fudge features purple, orange, and black fudge candy poured haphazardly into a pan, creating a visually striking camouflage effect. The vibrant colors and playful design are sure to be a hit with Halloween party guests and Trick-or-Treaters alike.
With just a handful of store-bought frostings and candy melts, you can create a delicious and impressive treat that disappears quickly!
Jump to:
Why You'll Love This Recipe
This recipe is a fantastic option for busy Halloween enthusiasts. It's quick to prepare, requires minimal cleanup, and the vibrant colors and festive sprinkles add a touch of spooky fun to your Halloween dessert spread. So, grab your candy melts, frosting, and get ready to create a batch of this bewitching Halloween fudge!
- Easy and Fun to Make: This recipe requires no baking and comes together in under 30 minutes, making it perfect for busy Halloween enthusiasts.
- Visually Stunning: The camouflage design of the fudge creates a unique and eye-catching centerpiece for your Halloween spread.
- Perfect for Kids: Simple ingredients and a fun pouring technique make this recipe a great activity to get kids involved in the kitchen.
- Customizable: Feel free to experiment with different candy melt colors to create your own unique camouflage patterns.
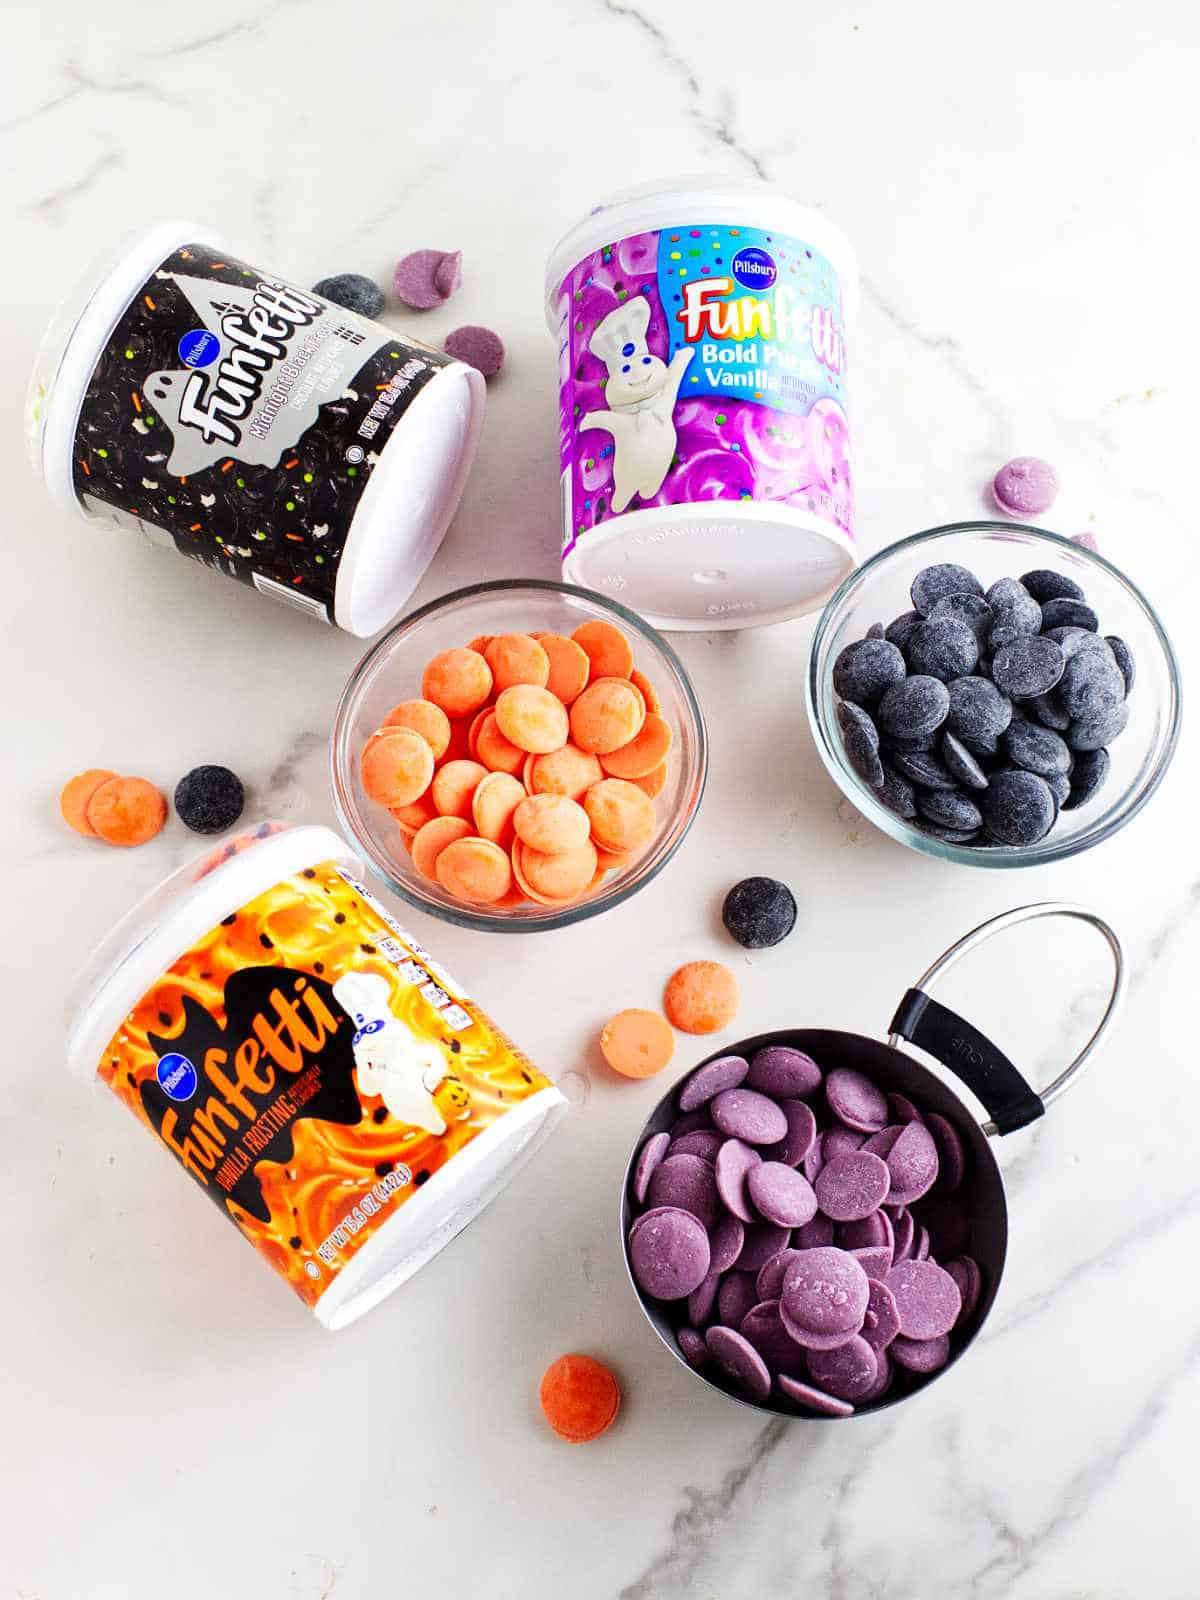
Ingredients You'll Need
Making this fudge is incredibly easy and requires easily available ingredients. It's the perfect recipe to get the kids involved in the kitchen for some spooky Halloween fun.
You can wait until the Fall and purchase tubs of Halloween colored frosting at the grocery store, or you can add food coloring gel to tubs of vanilla store bought frostings.
- Tubs of Halloween colored frosting
- Candy melts in matching colors
- Food coloring gel (optional, only needed if you're using uncolored vanilla frosting).
Full ingredient amounts and preparation instructions are in the printable recipe card at the bottom of this post.
How To Make This Camouflage Fudge
Grab your tubs of frosting and candy melts, a pan, and get ready to whip up a batch of this boo-tiful Halloween fudge!
Prepare the Pan
- Line an 8x8 inch baking pan with parchment paper.
- Remove the lid and foil seal from each of the three tubs of frosting. Microwave each individually for 30 seconds, then stir the contents with a spatula. Set aside while melting the candy melts.

Melt the Candy Wafers
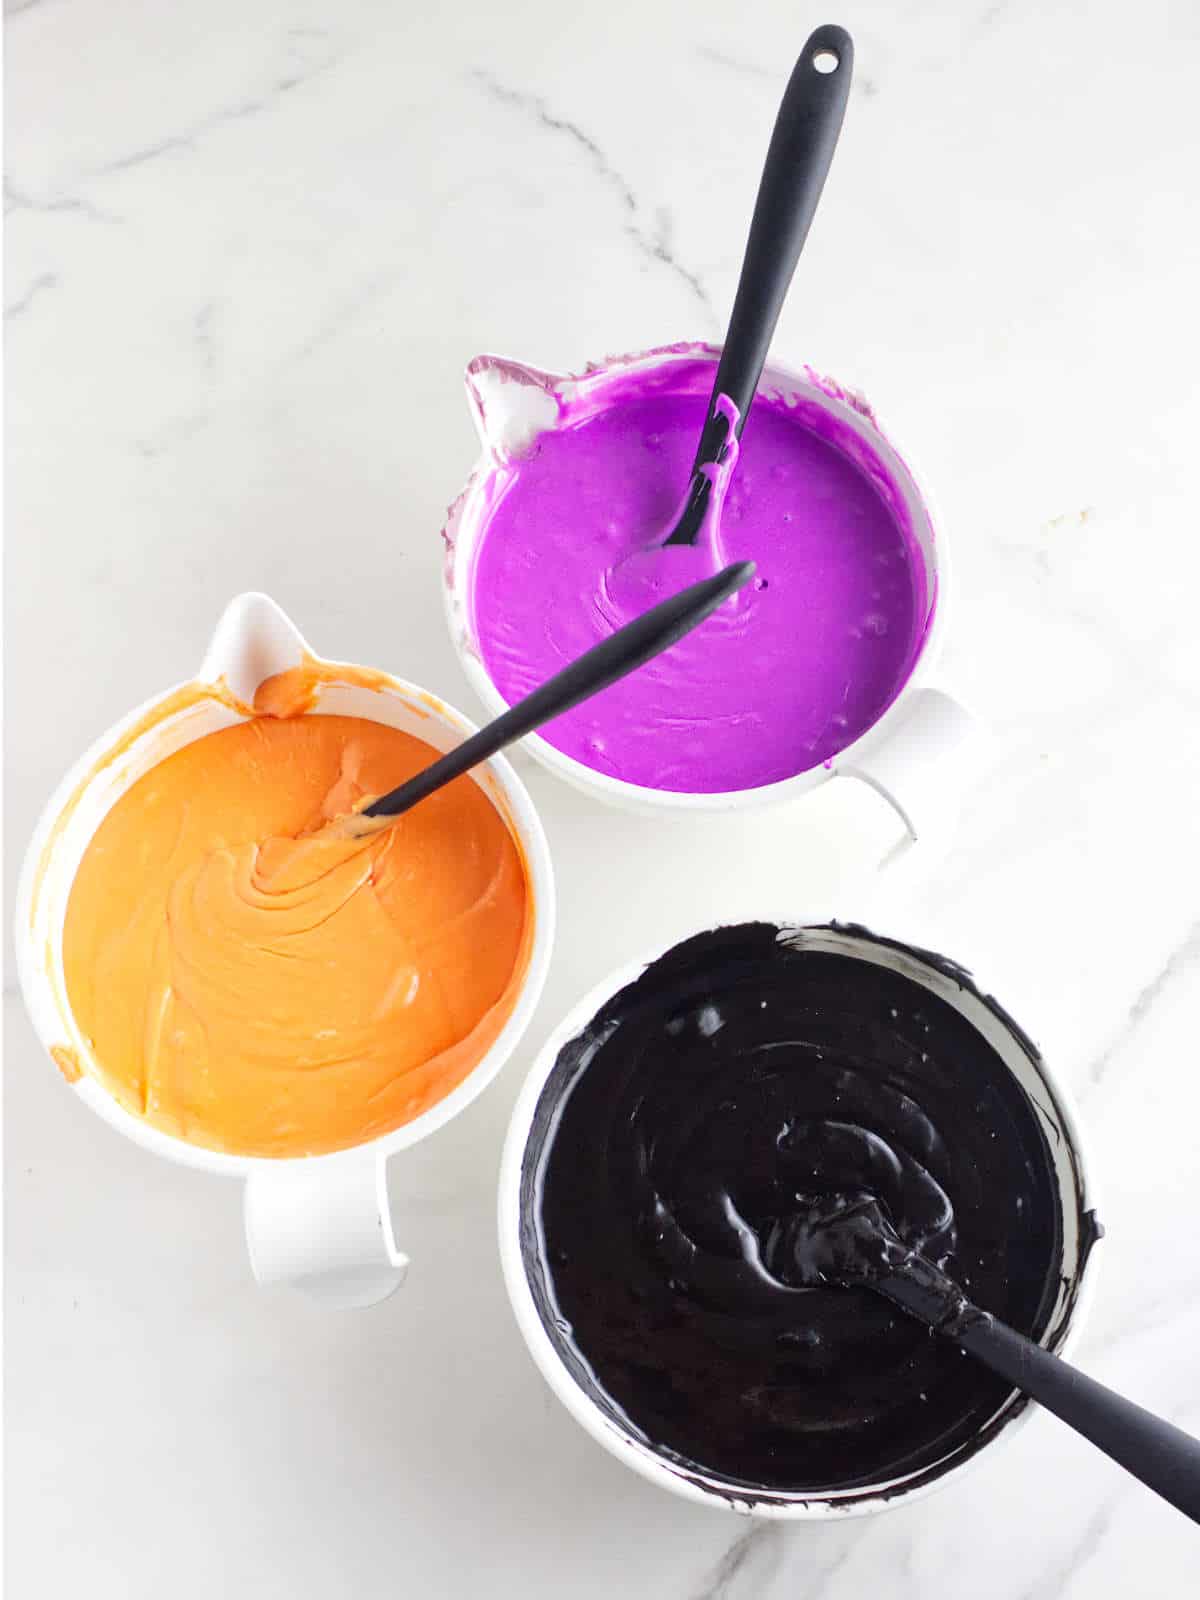
- In separate microwave-safe bowls, melt the purple, orange, and black candy melts according to package instructions. (Usually 30-second intervals at 50% power, stirring in between).
- Pour the melted frosting into the bowls of melted candy wafers, making sure to keep the colors aligned (black frosting into the black candy, purple frosting into the purple candy, and orange frosting into the orange melted candy).
- Stir until each bowl is mixed well for three separate colors of warm fudge.
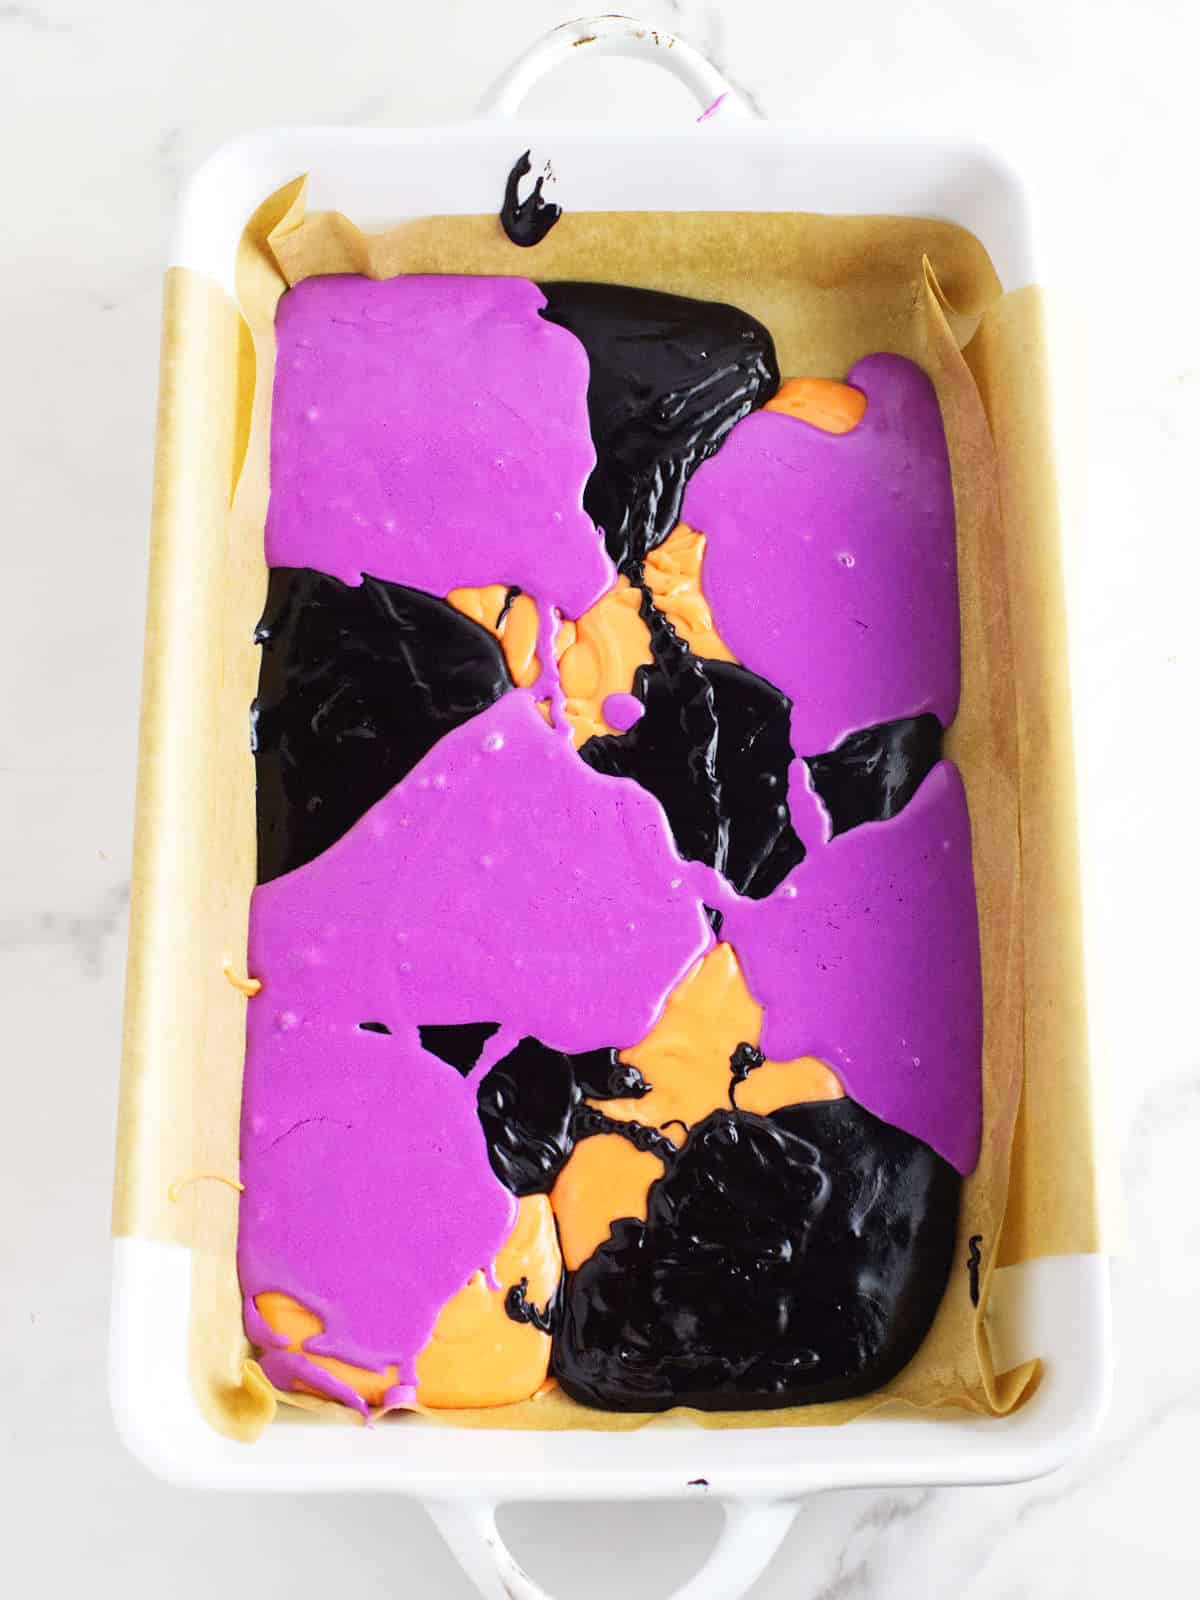
Pour A Camouflage Pattern
- Starting with the black melted fudge, pour half of it into the prepared pan. Then, carefully pour half of the orange fudge on top of the black layer, creating a dollop effect.
- Repeat with the remaining half of the purple and orange fudge. Finally, pour all of the remaining black fudge on top in dollops.
Add Spooky Sprinkles
- Sprinkle the top of the fudge with Halloween sprinkles, candies, and jimmies.
- Let the fudge set completely in the refrigerator for at least 4 hours, or until firm. Cut the fudge into squares and enjoy!
Serving Suggestions
Arrange the Camouflage Halloween Fudge on a platter for a festive centerpiece at your Halloween party. Serve alongside other spooky Halloween treats like cupcakes, brownies, or popcorn balls.
Package individual squares of fudge in cellophane bags or small treat boxes for trick-or-treaters or classroom treats.
Substitutions and Variations
Here are a few delicious variations or substitutions when making this fun Halloween camouflage fudge.
- Feel free to experiment with different candy melt colors to create your own unique camouflage patterns. You could use green instead of orange, or even add a splash of white for a winter camouflage effect.
- Get creative with your Halloween sprinkles! Use a variety of shapes and sizes to add a fun and festive touch to your fudge.
Tips for Success
Here are a few tips for making this fudge recipe:
- Lining the pan with parchment paper ensures easy removal of the fudge once it's set.
- Swirling the colors a few times is fine, but avoid overmixing as it can create a muddy look.
- The fudge needs to be chilled for at least 2 hours to set firm enough for cutting.
- For clean cuts, use a sharp knife to cut the fudge into squares.
Related Recipes
- Halloween Brimstone Red Velvet Cookies
- Halloween Jello Brain
- Halloween Sheet Pan Sugar Cookies (2 Ways To Make)
- 28 Spooktacular Halloween Party Trick or Treats
- Halloween Orange Sherbet Punch
Storage Options
- Store leftover Camouflage Halloween Fudge in an airtight container in the refrigerator for up to 5 days.
- The fudge can also be frozen for up to 2 months. Thaw overnight in the refrigerator before serving.
Frequently Asked Questions
Yes, you can use white chocolate chips melted in a double boiler. You may need to add some food color to the melted white chocolate and frosting though.
Absolutely! You can use any colors you like to create your own unique camouflage design. Consider using green or brown candy melts for a more
No problem! Just about any color of sprinkles can work. You can also use chopped peanuts or M&M's. The Halloween frosting tubs often come with sprinkles inside the cap as well!
If you can't find the specialty Halloween colored frosting (it's seasonal), simply stir in gel food color into the warmed up frosting tubs. Stir well and then add to the melted candy wafers.
Use the Defrost setting on your microwave. Heat for 1 minute the first time, then in subsequent 20 second intervals. You can also add a teaspoon of coconut oil or shortening once the melting starts. Stir it in as they wafers melt. It helps prevent seizing.
More Delish Ideas
- Pumpkin Pie Ice Cream
- Halloween Chex Snack Mix
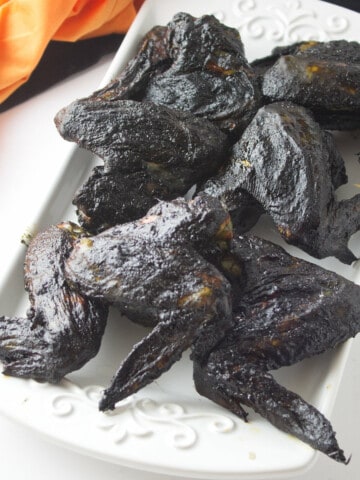
- Halloween Sweet and Sour Chicken 'Bat' Wings
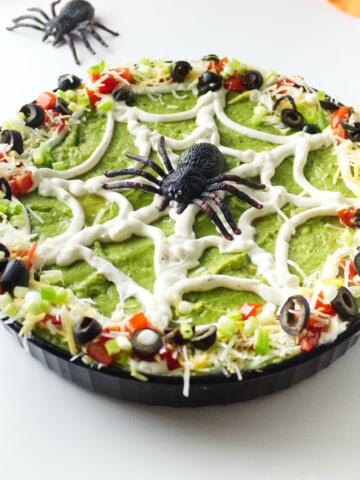
- Halloween 7 Layer Dip (Spider Web Taco Dip)

Halloween Camo Fudge
Ingredients
- 1 tub orange frosting
- 1 tub black frosting
- 1 tub purple frosting
- ¾ cup purple candy melts
- ¾ cup orange candy melts
- ¾ cup black candy melt
Instructions
- Line an 8x8 inch baking pan with parchment paper.
- Remove the lid and foil seal from each of the three tubs of frosting. Microwave each individually for 30 seconds, then stir the contents with a spatula. Set aside while melting the candy melts.1 tub orange frosting, 1 tub black frosting, 1 tub purple frosting
- In separate microwave-safe bowls, melt the purple, orange, and black candy melts according to package instructions. (Usually 30-second intervals at 50% power, stirring in between).¾ cup purple candy melts, ¾ cup orange candy melts, ¾ cup black candy melt
- Pour the melted frosting into the bowls of melted candy wafers, making sure to keep the colors aligned (black frosting into the black candy, purple frosting into the purple candy, and orange frosting into the orange melted candy). Stir until each is mixed well for three separate colors of warm fudge.
- Starting with the black melted fudge, pour half of it into the prepared pan. Then, carefully pour half of the orange fudge on top of the black layer, creating a dollop effect.
- Repeat with the remaining half of the purple and orange fudge. Finally, pour all of the remaining black fudge on top in dollops.
- Sprinkle the top of the fudge with Halloween sprinkles and jimmies.
- Let the fudge set completely in the refrigerator for at least 4 hours, or until firm. Cut the fudge into squares and enjoy!
Notes
- Lining the pan with parchment paper ensures easy removal of the fudge once it's set.
- Swirling the colors a few times is fine, but avoid overmixing as it can create a muddy look.
- The fudge needs to be chilled for at least 2 hours to set firm enough for cutting.
- For clean cuts, use a sharp knife to cut the fudge into squares.

Leave a Reply