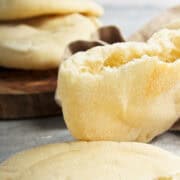
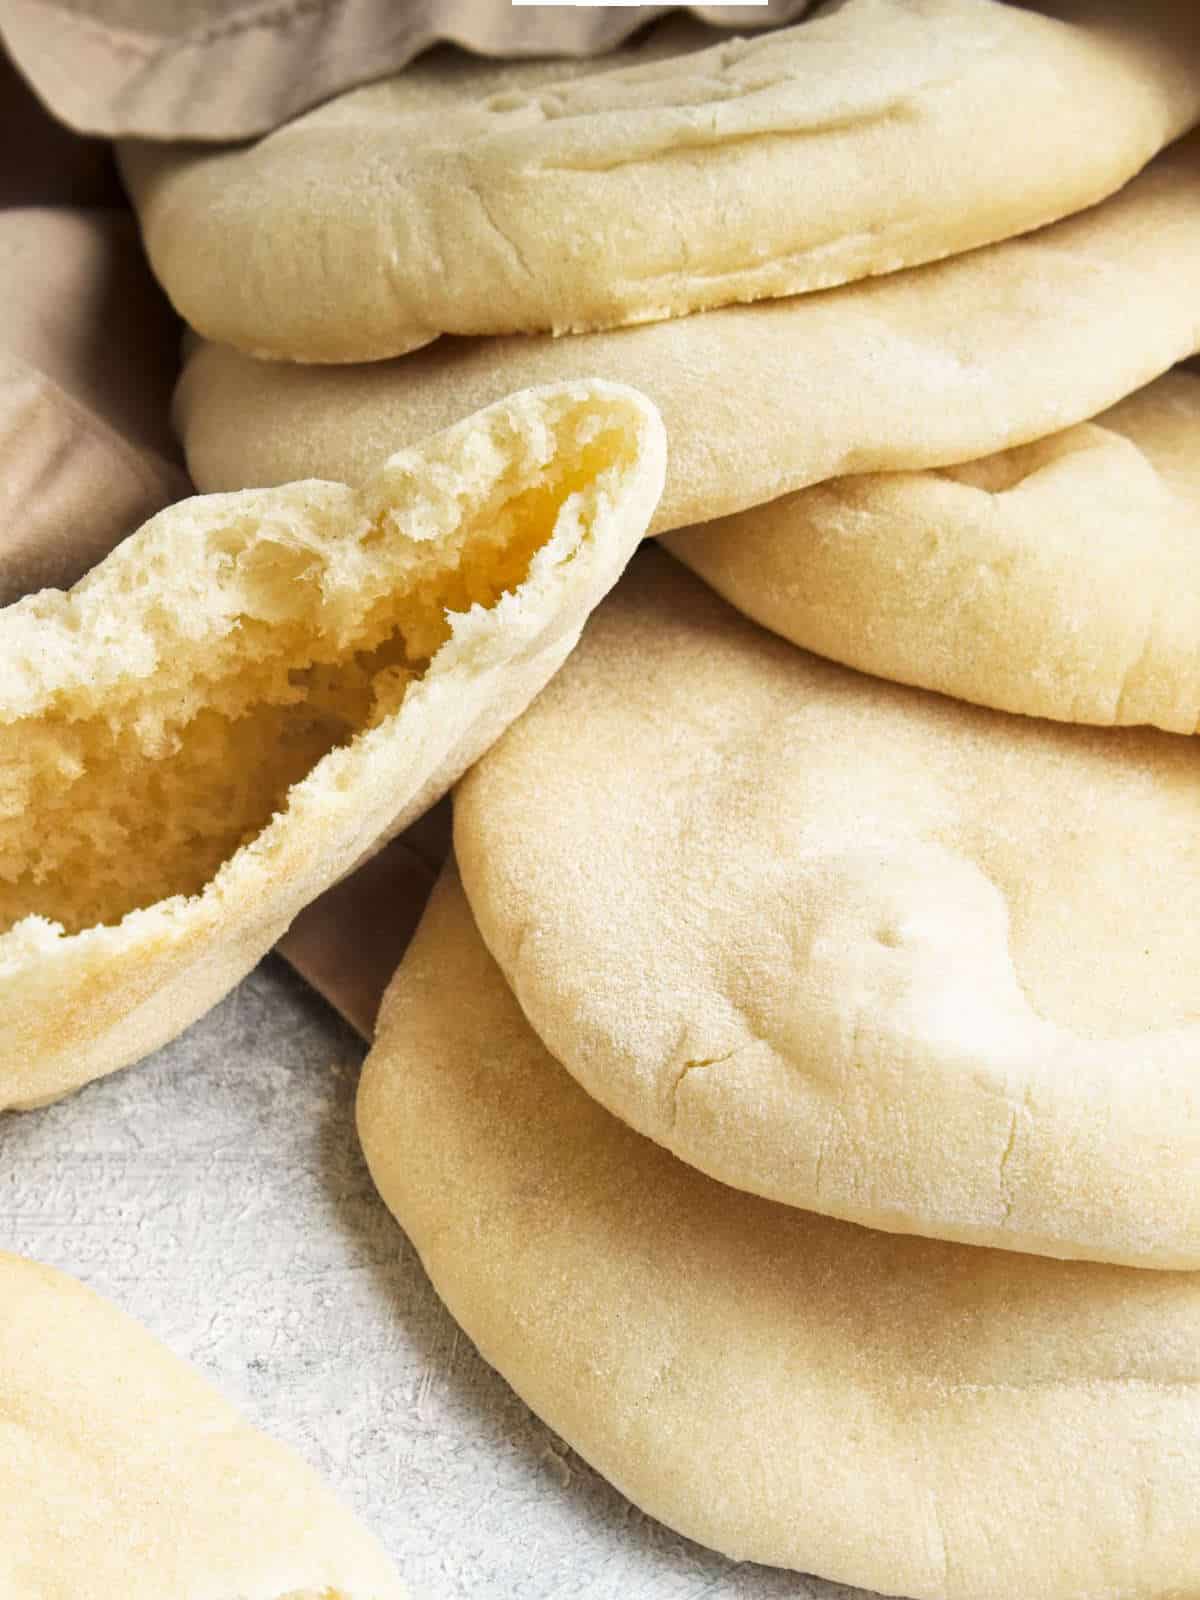
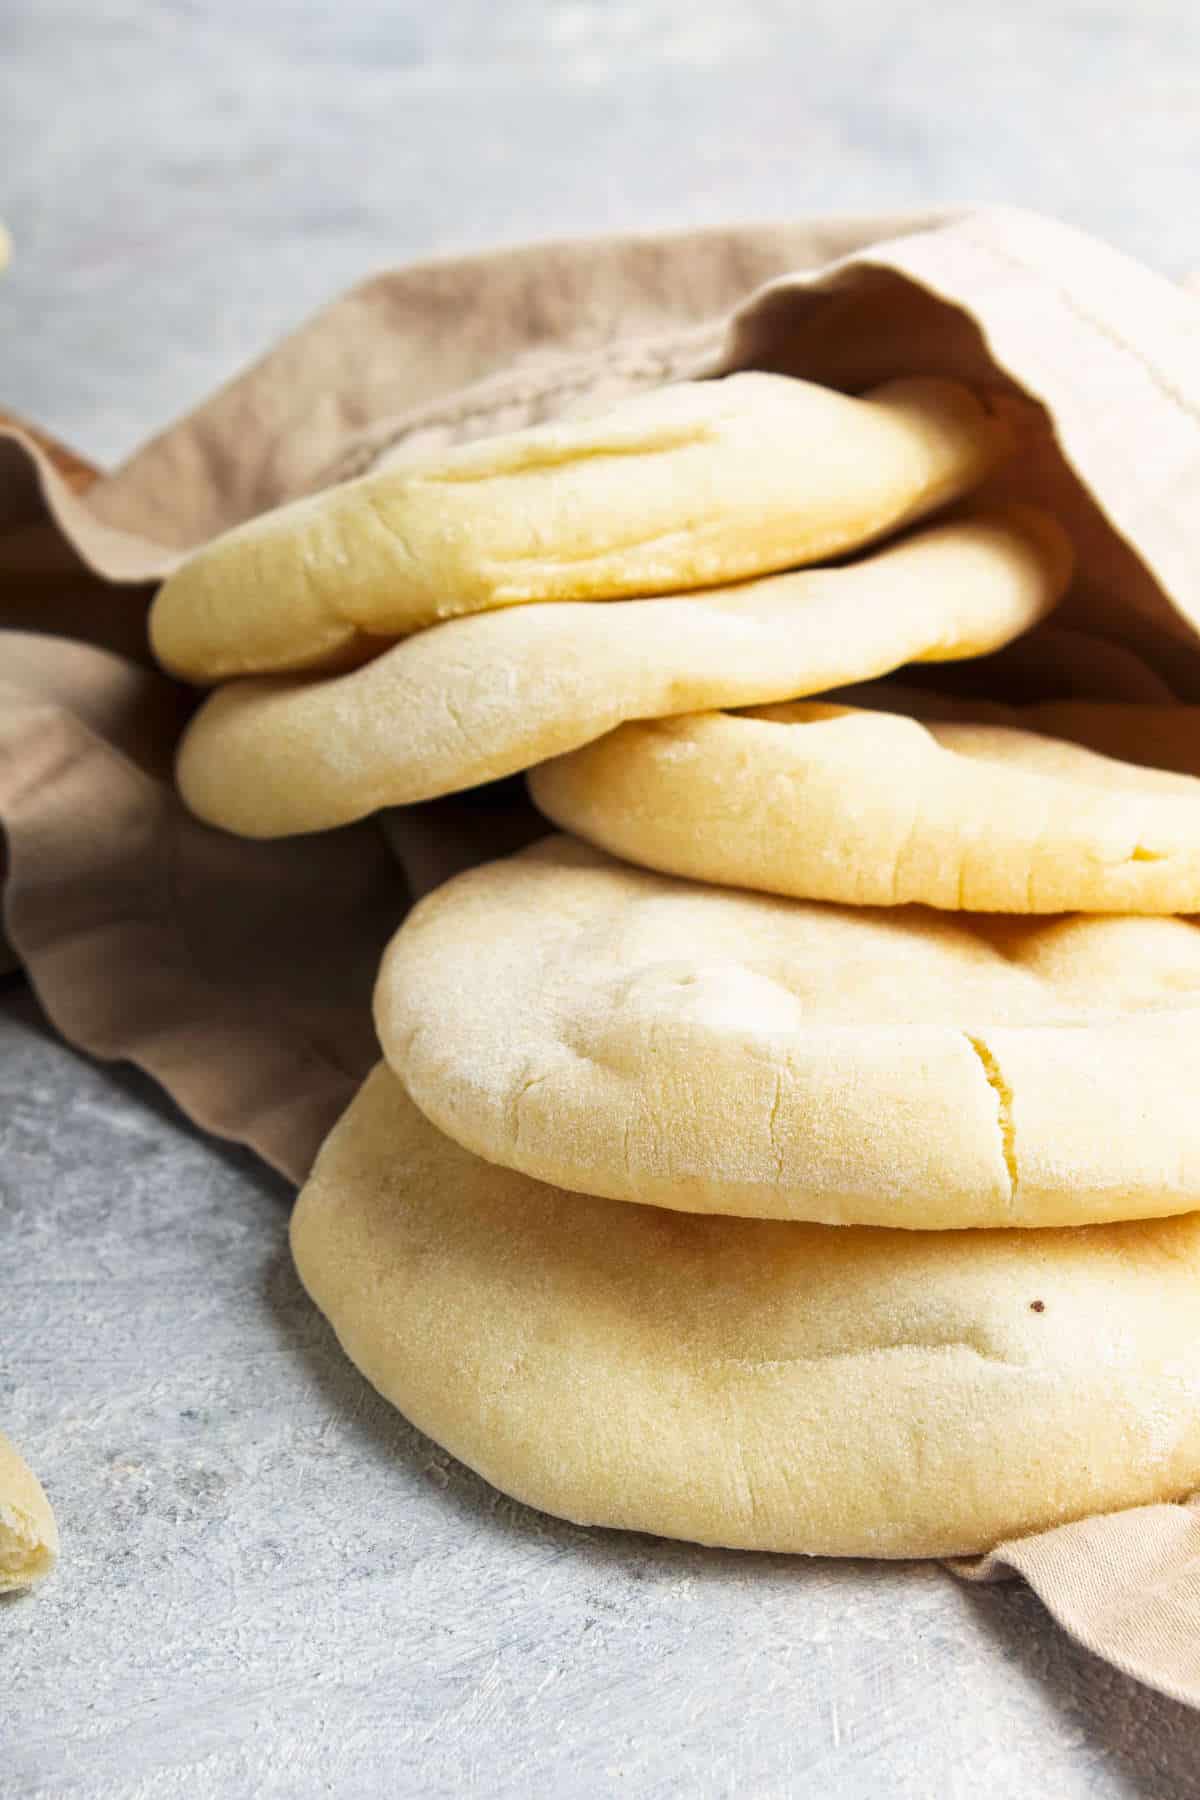
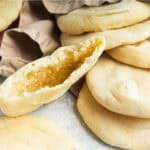
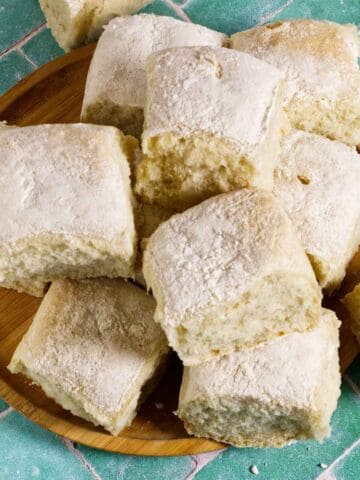
Mini Pita Bread rounds are soft, pocket-style rounds perfect for dipping, filling, or serving alongside your favorite Middle Eastern dishes. They're quick to make at home and bring a fresh, warm element to any meal.
Why You'll Love This Mini Pita Bread Rounds Recipe
This Mini Pita Bread recipe works because it uses a simple dough that's easy to handle and rises quickly, producing soft, pocketed rounds every time. The method creates a light texture with just enough chew, making them perfect for dipping, stuffing, or serving alongside flavorful Middle Eastern dishes.
- Quick and approachable: The dough comes together easily, even if you're new to bread baking.
- Versatile: Perfect for dipping, filling with spreads or meats, or serving alongside Middle Eastern dishes.
- Fresh homemade flavor: You get warm, soft pitas straight from your oven without relying on store-bought bread.
Ingredients Overview
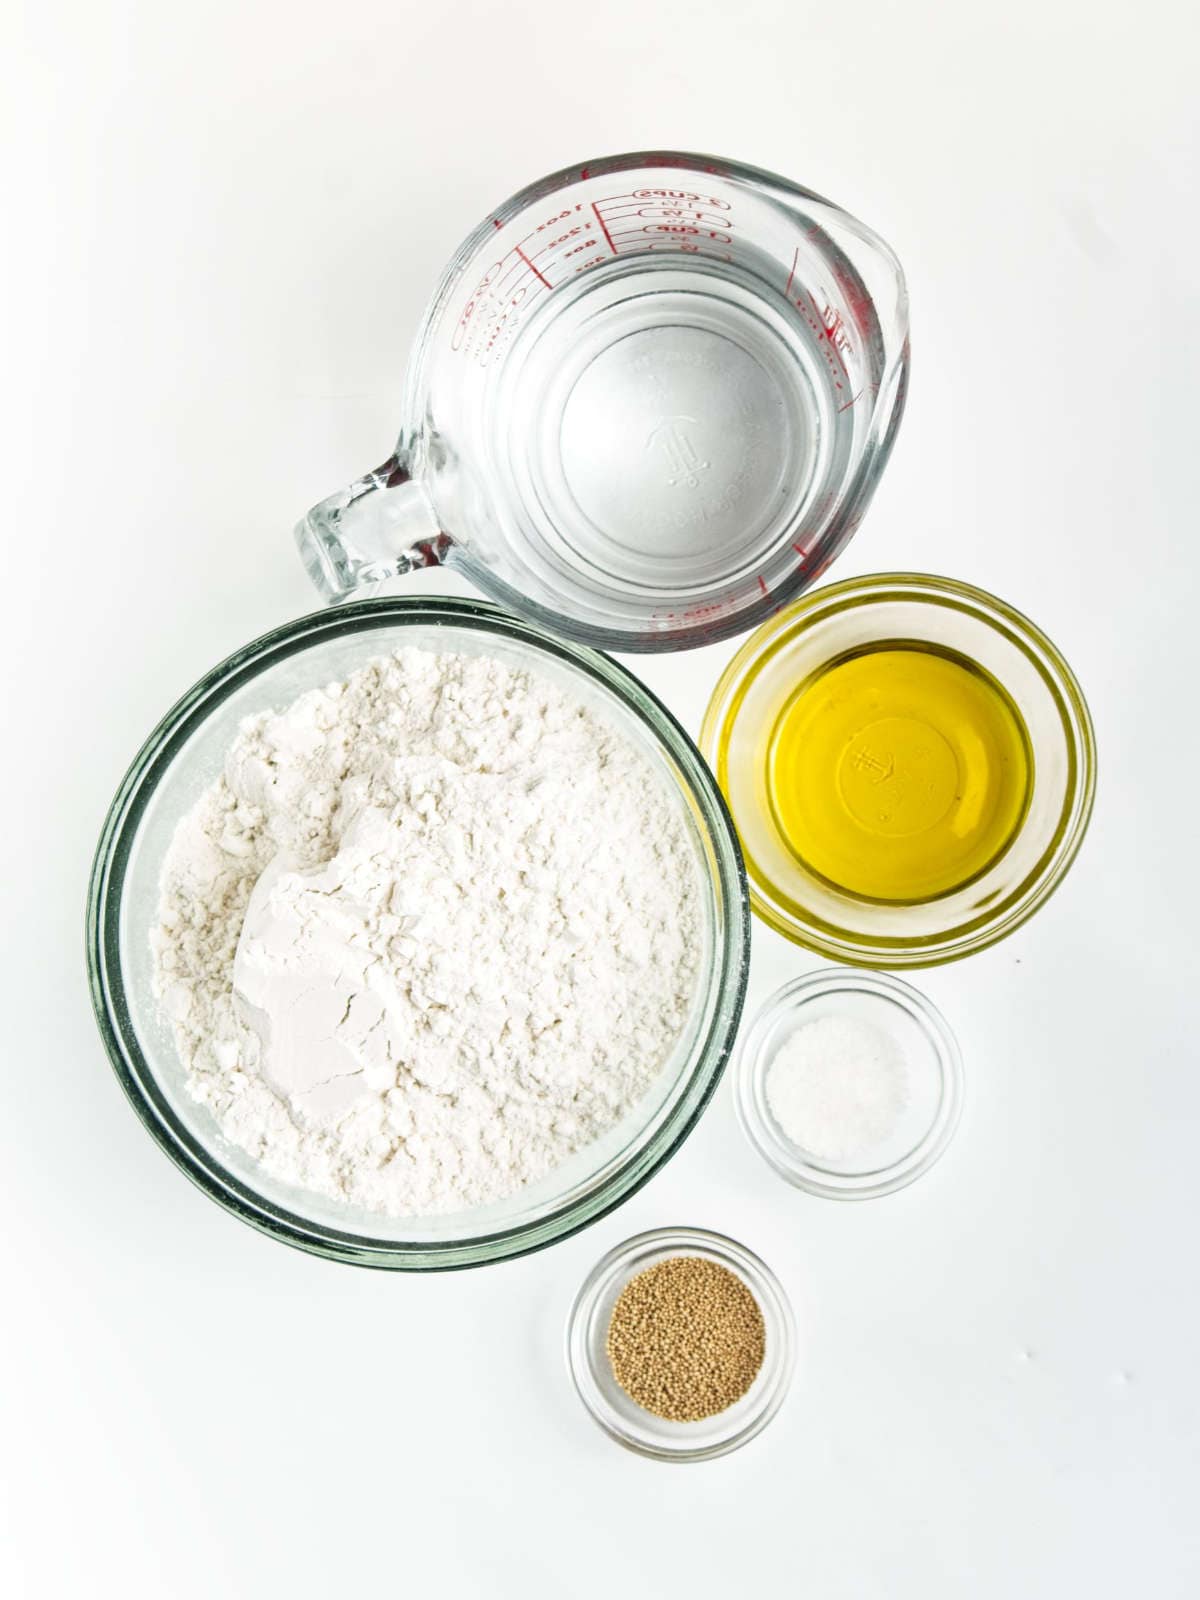
This Mini Pita Bread recipe relies on a few basic ingredients - flour, water, yeast, salt, and a bit of olive oil - to create soft, airy rounds with perfect pockets. The yeast helps the dough rise, while the olive oil adds a subtle richness and tenderness.
For the complete ingredient list, exact measurements, and step-by-step instructions, check the recipe card below.
How to Make Mini Pita Bread Rounds
Making mini pita rounds starts with mixing a simple dough of flour, water, instant yeast, salt, and a bit of olive oil, then letting it rise until soft and puffy. After dividing and rolling the dough into small, even rounds, they're baked quickly on a hot surface so they puff up and form pockets.
This step-by-step approach ensures soft, airy pitas that are perfect for dipping, stuffing, or serving alongside your favorite Middle Eastern dishes.
Pro Tip
If you prefer to use Instant yeast instead of Active yeast, just add it directly to the flour mixture and skip Step 1 yeast proofing.
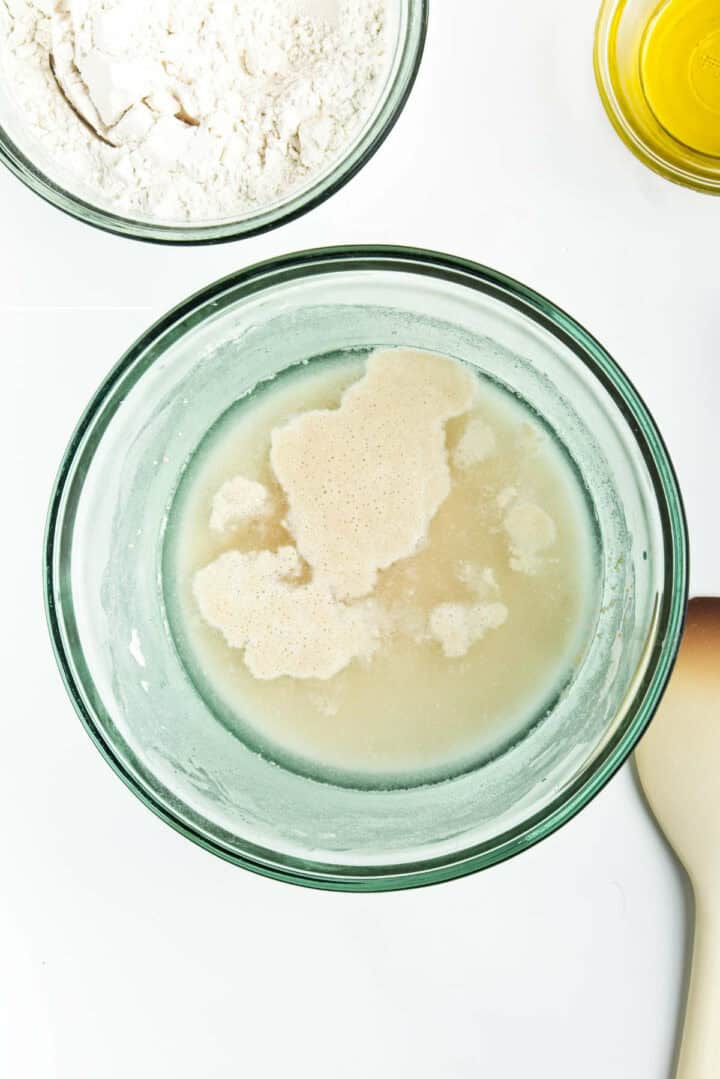
Step 1: In a large bowl, combine warm water (no more than 110°F) with ¼ cup. Stir to dissolve. Sprinkle the yeast on top and set aside for about 10 minutes until foamy.
Step 2: Add the remaining flour, salt, and olive oil. Stir until everything comes together in a sticky dough.
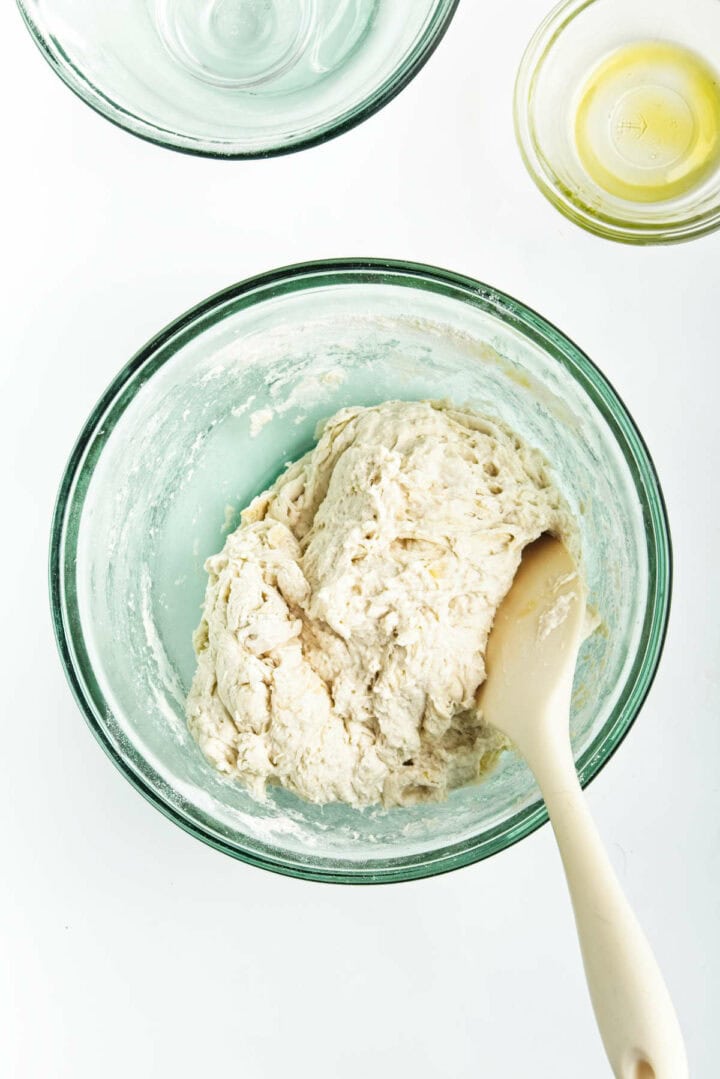
Step 3: Turn out on a floured surface and knead for 7-10 minutes until smooth and soft. If the dough is still sticking to your hands more than itself, add a bit more flour a tablespoon at a time.
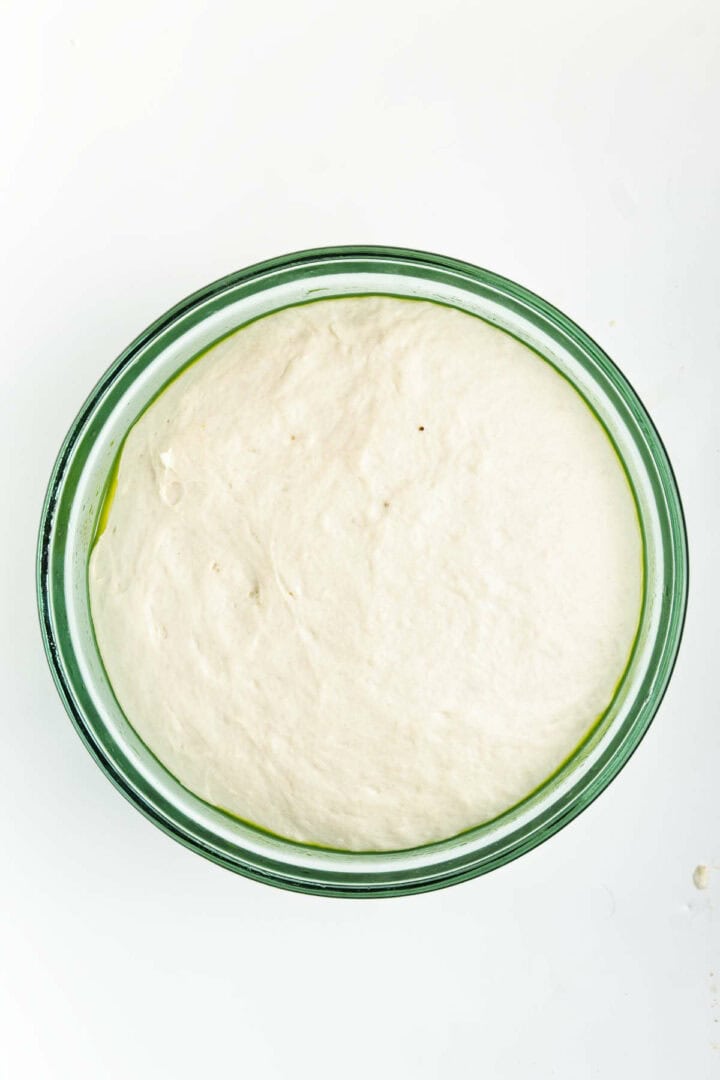
Place dough into a greased bowl and cover with plastic wrap or a damp cloth. Place in a warm location and allow to rise until 2.5-3x the size, about 1 hour depending on the ambient temperature.
Step 4: Preheat oven to 475°F. Place a heavy baking sheet in the oven to heat as well.
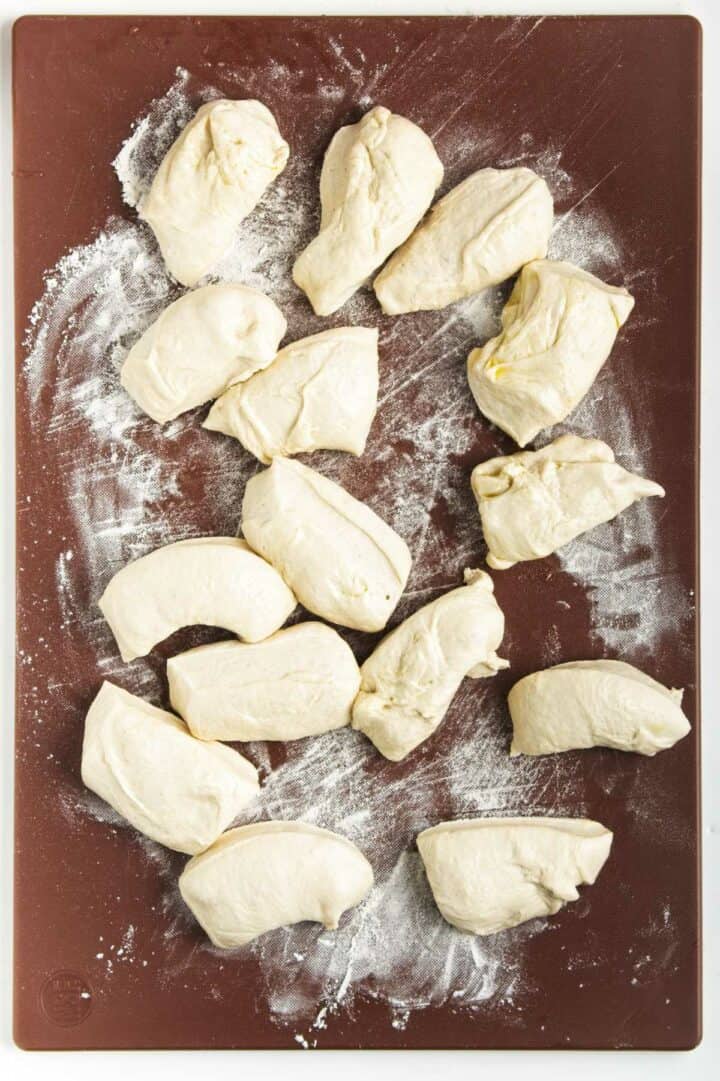
Turn dough out on to lightly floured surface and cut into 15 equal pieces.
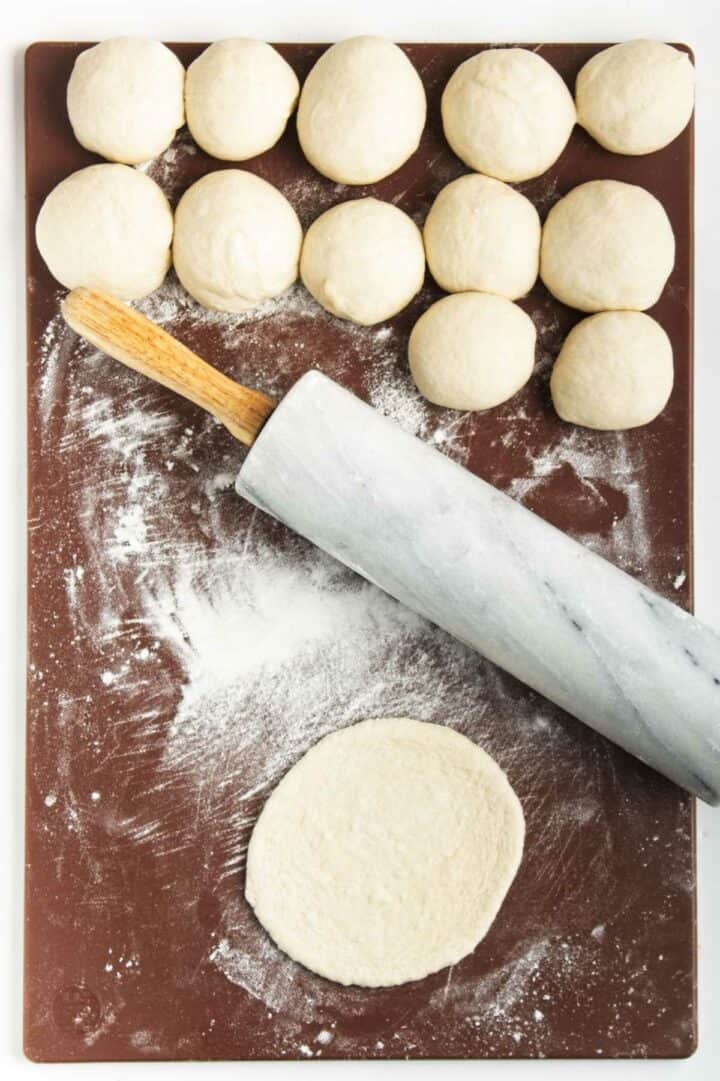
Step 5: With each piece, fold the edges into the center and roll between your palms to form a ball. Set aside to rest for 5-7 minutes covered with a cloth so the gluten relaxes.
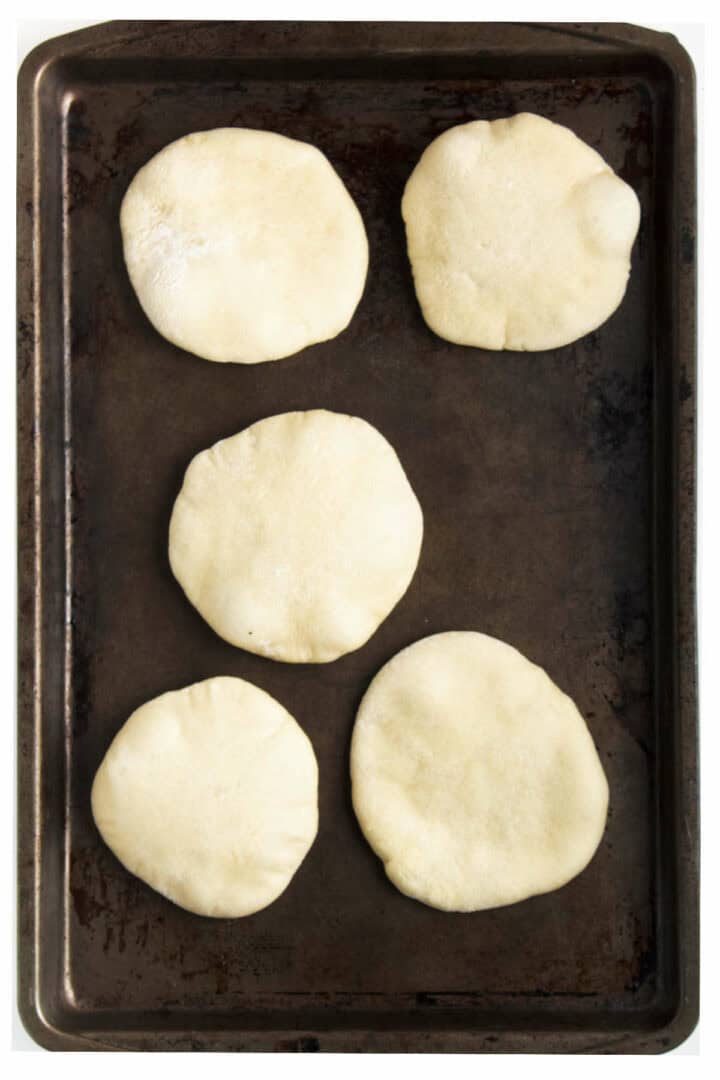
On a well-floured surface, use a rolling pin to roll each piece into a 5 inch circle slightly more than ¼" thick. Rest the formed pitas for 15 minutes.
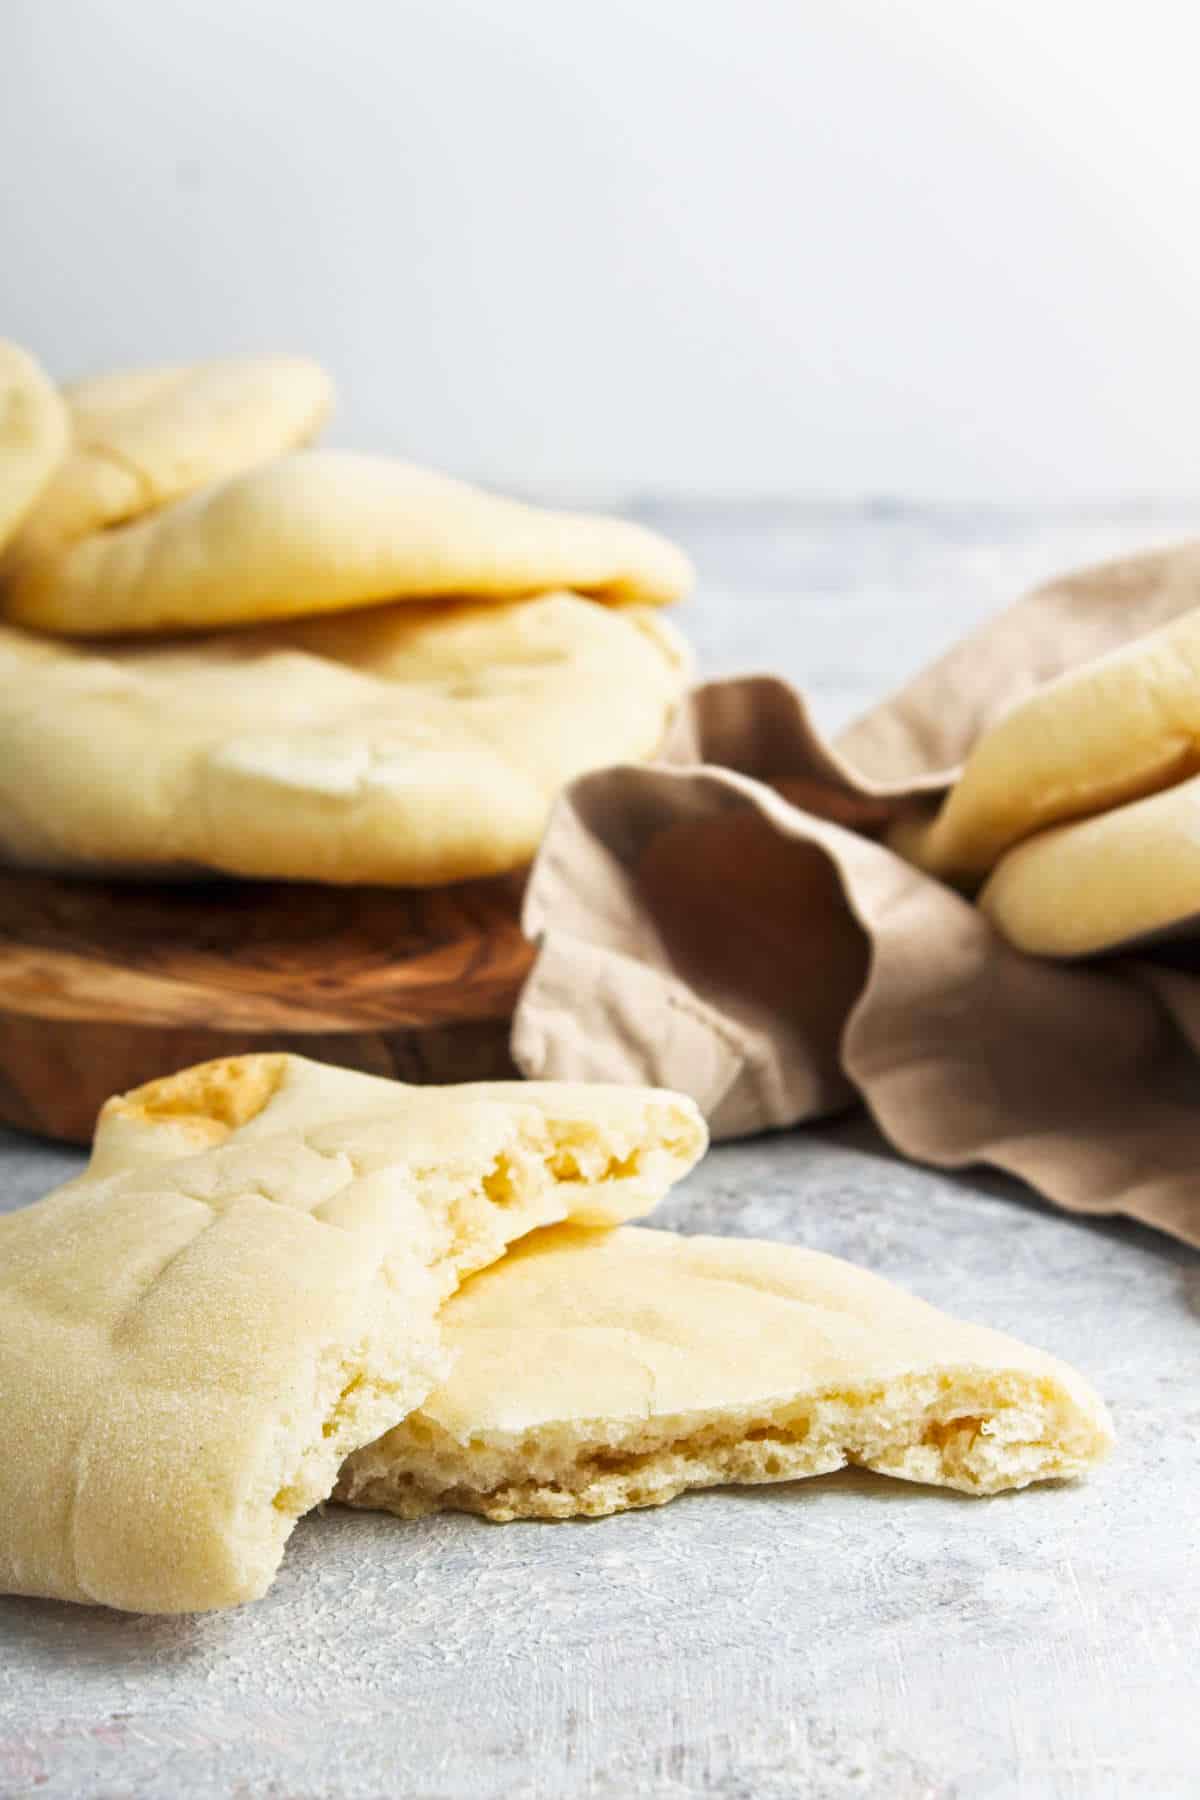
Step 6: Bake 3 - 5 pitas at a time by placing them on the preheated baking sheet. Bake for 2 - 3 minutes until well puffed (but not turning brown). Remove immediately and place a new batch in the oven. Once removed from the oven the pitas will collapse, but will still have the pocket inside when cut open.
Serving Suggestions
Mini Pita Bread rounds are perfect for creating a fun, customizable spread. Serve them warm with Moroccan shakshuka and a sprinkle of za'atar, or with a whipped feta dip. They're also great for dipping into fresh tzatziki, or for stuffing with roasted or grilled Mediterranean vegetables and fresh greens for a light, satisfying lunch or snack.
Pair them with classics like lamb kofta and watermelon feta salad with for a complete and satisfying spread.
Substitutions and Variations
Some useful tips and substitutions when making this recipe:
- Flour options - Swap all-purpose flour for whole wheat flour for a heartier flavor, or use a blend for a slightly denser texture.
- Gluten-free option - Use a gluten-free all-purpose flour blend, keeping in mind the texture may be a bit softer.
- Oil alternatives - Substitute olive oil with avocado oil or melted butter for a different flavor profile.
- Flavor additions - Mix in herbs like za'atar, garlic powder, or sesame seeds into the dough for extra taste.
- Size variations - Make larger pita rounds for sandwiches or smaller ones for appetizers and dips.
Tips for Success
Helpful tips to help you when making this recipe:
- Measure ingredients accurately: Proper flour and water ratios help the dough rise correctly and form pockets.
- Check yeast freshness: Active yeast ensures the pitas puff up; proof it in warm water first to be sure it is active enough.
- Let the dough rest: Allowing it to rise fully creates soft, airy pitas with good structure.
- Preheat the oven: A hot oven helps the pitas puff quickly and develop light, airy pockets.
- Roll evenly: Roll each dough ball to a consistent thickness so all pitas bake evenly and puff properly.
Storage Options
Here is how I store leftovers when making this recipe:
- Room temperature: Store cooled mini pita breads in a paper bag or airtight container for up to 2 days.
- Refrigerator: Keep in a sealed container for up to a week, though the bread may lose some softness.
- Freezer: Freeze stacked pita breads in a freezer-safe bag for up to 2-3 months.
- Reheating: Warm frozen or day-old pitas in a hot oven or on a skillet for a few minutes to restore softness and pliability.
Related Recipes
- Lahmacun
- Crispy Falafel Wraps
- Roasted Zucchini Hummus Dip
- Pistachio Baklava
- Homemade Greek Seasoning Recipe
Frequently Asked Questions
Pita needs a very hot cooking surface (oven or skillet) and even rolling - uneven thickness or insufficient heat can stop puffing and prevent pockets from forming.
Yes - pita dough should feel soft and slightly tacky; if it's too dry, it won't trap enough steam to puff up properly, so add water sparingly until the texture feels right.
You can make the dough ahead and let it rise in the fridge; just shape and bake fresh when you're ready for warm mini pita rounds.
It often comes down to not enough salt or rushing the rest/rise time - giving the dough full rising time improves flavor significantly.
Instant yeast works well and can be mixed straight into the flour without proofing, which makes the process more convenient for busy home cooks.
Middle Eastern Recipes


Get The Recipe!
Mini Pita Bread Rounds
Equipment
- Large Rimmed Cookie sheet with cooling racks
Ingredients
- 3 ¼ cup all-purpose flour
- 2 ¼ teaspoon active dry yeast
- 1 teaspoon salt
- 2 tablespoon olive oil
- 1 ¼ cup water lukewarm
Instructions
- In a large bowl, combine warm water (no more than 110°F) with ¼ cup. Stir to dissolve. Sprinkle the yeast on top and set aside for about 10 minutes until foamy.
- Add the remaining flour, salt, and olive oil. Stir until everything comes together in a sticky dough.
- Turn out on a floured surface and knead for 7-10 minutes until smooth and soft. If the dough is still sticking to your hands more than itself, add a bit more flour a tablespoon at a time.
- Place dough into a greased bowl and cover with plastic wrap or a damp cloth. Place in a warm location and allow to rise until 2.5-3x the size, about 1 hour depending on the ambient temperature.
- Preheat oven to 475°F. Place a heavy baking sheet in the oven to heat as well.
- Turn dough out on to lightly floured surface and cut into 15 equal pieces.
- With each piece, fold the edges into the center and roll between your palms to form a ball. Set aside to rest for 5-7 minutes covered with a cloth so the gluten relaxes.
- On a well-floured surface, use a rolling pin to roll each piece into a 5 inch circle slightly more than ¼" thick. Rest the formed pitas for 15 minutes.
- Bake 3-5 pitas at a time by placing them on the preheated baking sheet. Bake for 2-3 minutes until well puffed (but not turning brown). Remove immediately and place a new batch in the oven. Once removed from the oven the pitas will collapse, but will still have the pocket inside when cut open.
- Serve immediately or store in an airtight container in the fridge for up to 3 days.
Notes
- Activate Your Yeast Properly: Ensure your water is the right temperature (around 105-115°F or 40-46°C) to properly activate the yeast. If your yeast doesn't foam, it's likely dead, and your dough won't rise.
- Don't Over-Flour: Add flour gradually and stop when the dough is still slightly tacky but manageable. Too much flour will result in dry, tough pitas that won't puff well.
- Allow for Sufficient Rise Time: Let the dough rise in a warm, draft-free place until it has doubled in size. This can vary based on room temperature, so be patient. A good rise ensures light, airy pitas.
- Roll Evenly and Consistently: When rolling out your dough balls, aim for an even thickness (about ¼ inch). Inconsistent thickness can lead to uneven puffing, with some parts crisping while others remain soft.
- Preheat Your Baking Surface Thoroughly: Whether using a cast-iron skillet, a baking stone, or a baking sheet, ensure it's screaming hot before you place the pitas on it. High, immediate heat is crucial for the "pocket" to form and for the pitas to puff up.
Kelly Bloom says
Just the right size for dipping up hummus or into seasoned bread oil.