Easter baskets overflowing with brightly colored eggs are a quintessential symbol of the season. But have you ever considered ditching the store-bought dye kits and creating your own vibrant hues using natural dyes?
Natural dyes, readily available in your kitchen or garden, offer a safe, eco-friendly, and surprisingly effective way to create beautiful Easter eggs.
Not only is it a fun activity for the whole family, but it also allows you to connect with the tradition in a more sustainable way.
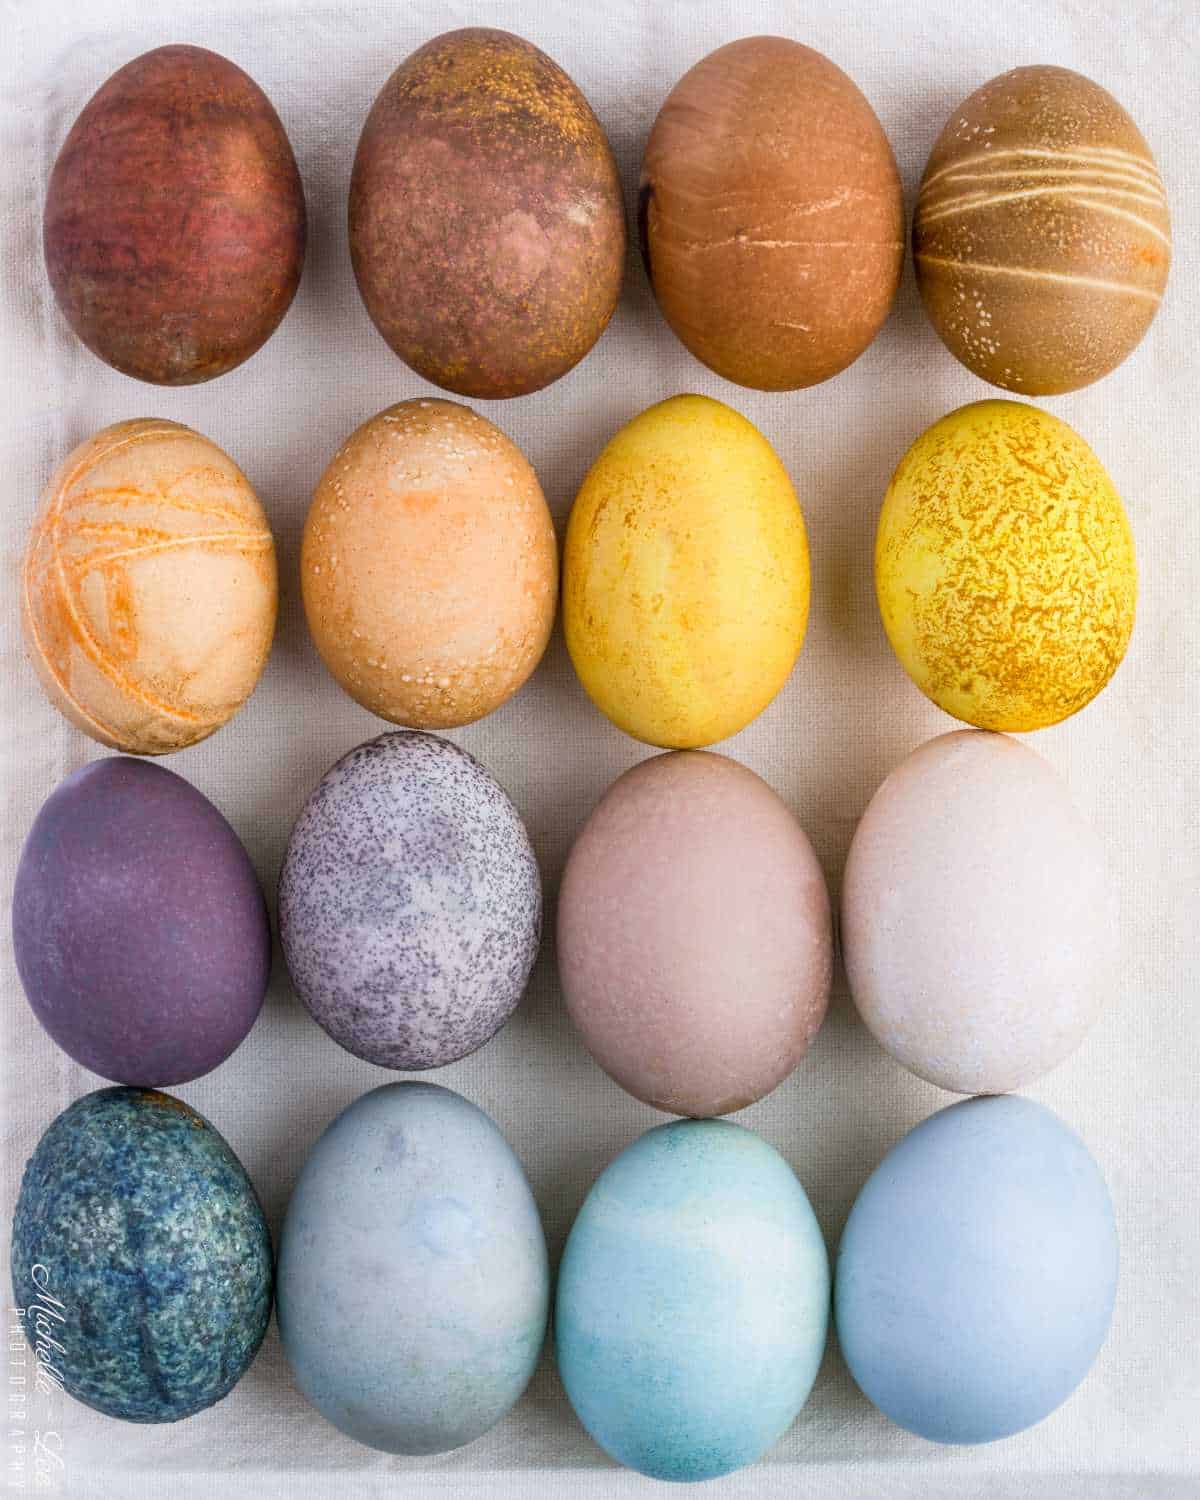
A Rainbow of Natural Dyes
Natural dyes offer a safe and eco-friendly alternative to store-bought chemical dyes. They are non-toxic, making them perfect for families with young children who might be tempted to put the eggs in their mouths.
Additionally, natural dyes are biodegradable and won't harm the environment when disposed of properly.
Natural Dye Palette
From the vibrant reds of beets to the calming blues of blueberries, nature offers a surprisingly wide range of colors perfect for dyeing Easter eggs.
Nature provides a bountiful palette of colors waiting to be explored. Here are some readily available ingredients and the vibrant shades they produce:
The Natural Rainbow
Here's a glimpse into some common natural dyes and the colors they produce:
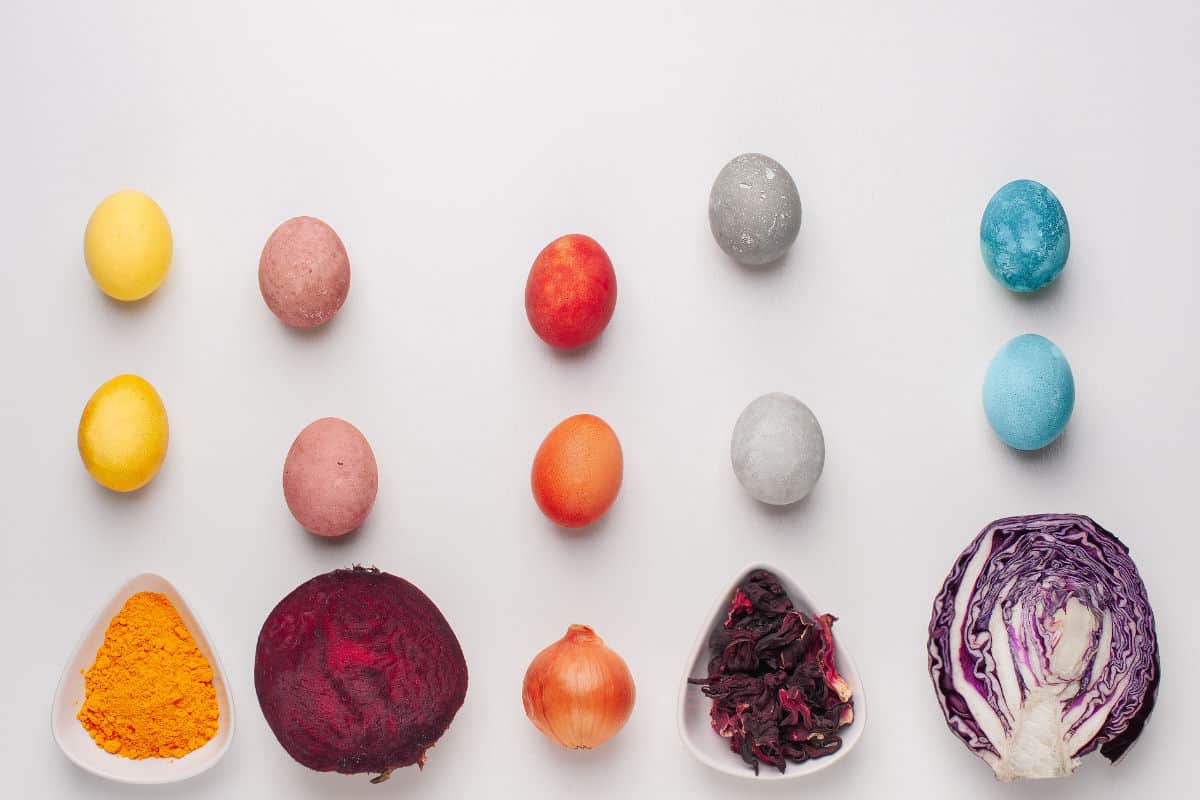
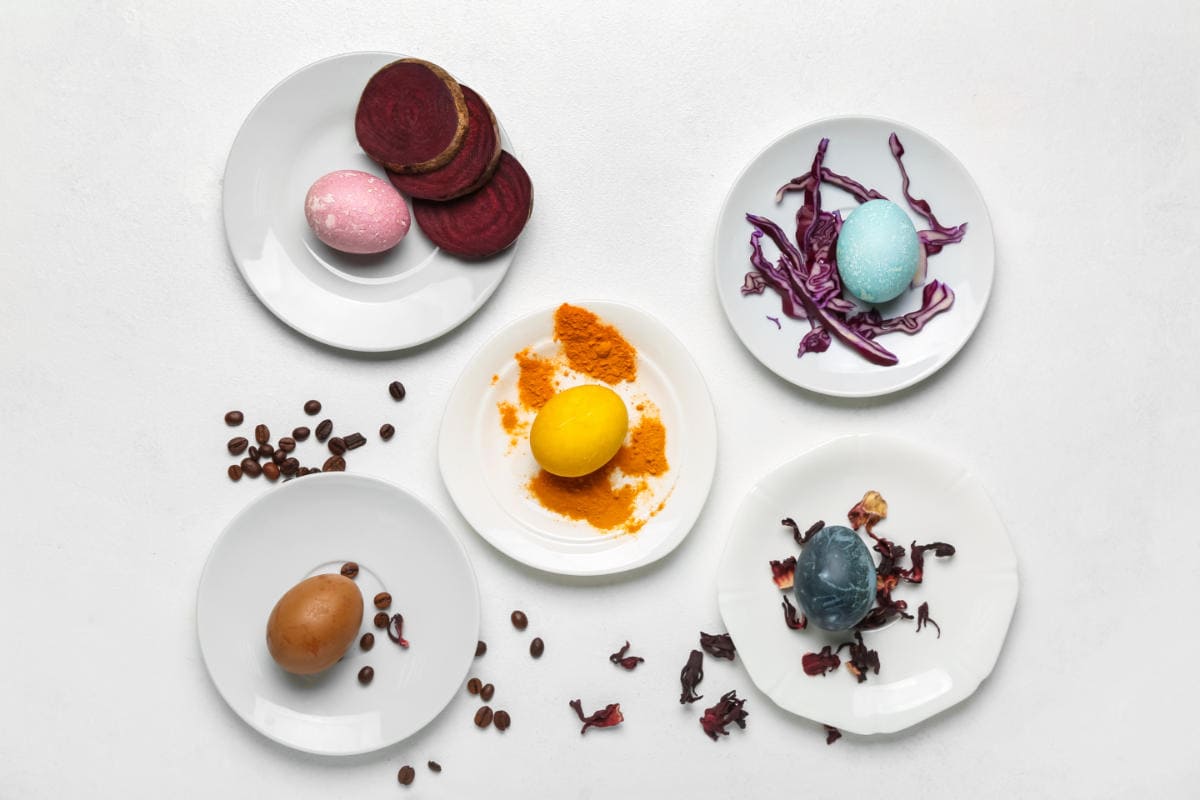
- Red: For a classic red, look no further than beets. Simply boil sliced beets in water, strain the liquid, and let your eggs simmer in the beetroot bath for a rich, ruby red. Red onion skins can also produce a stunning range of reds and pinks depending on the simmering time.
- Pink: Hibiscus flowers with baking soda or alum make beautiful shades of rose and pink.
- Orange: Carrot puree (baby food) and Brown onion peels offer a warm spectrum of orange hues. Simmer your eggs with these ingredients for a vibrant orange glow. Rooibos tea makes a great orange also!
- Yellow: Turmeric is a natural champion for yellow. Create a sunshine yellow by simmering your eggs in a turmeric solution. Chamomile flowers are inexpensive and make a lemony yellow. Saffron, while more expensive, offers a luxurious golden yellow hue.
- Green: Spinach leaves, pureed, offer a beautiful range of greens, from a light lime to a deeper emerald. Simply simmer your eggs with a generous amount of spinach for a verdant hue.
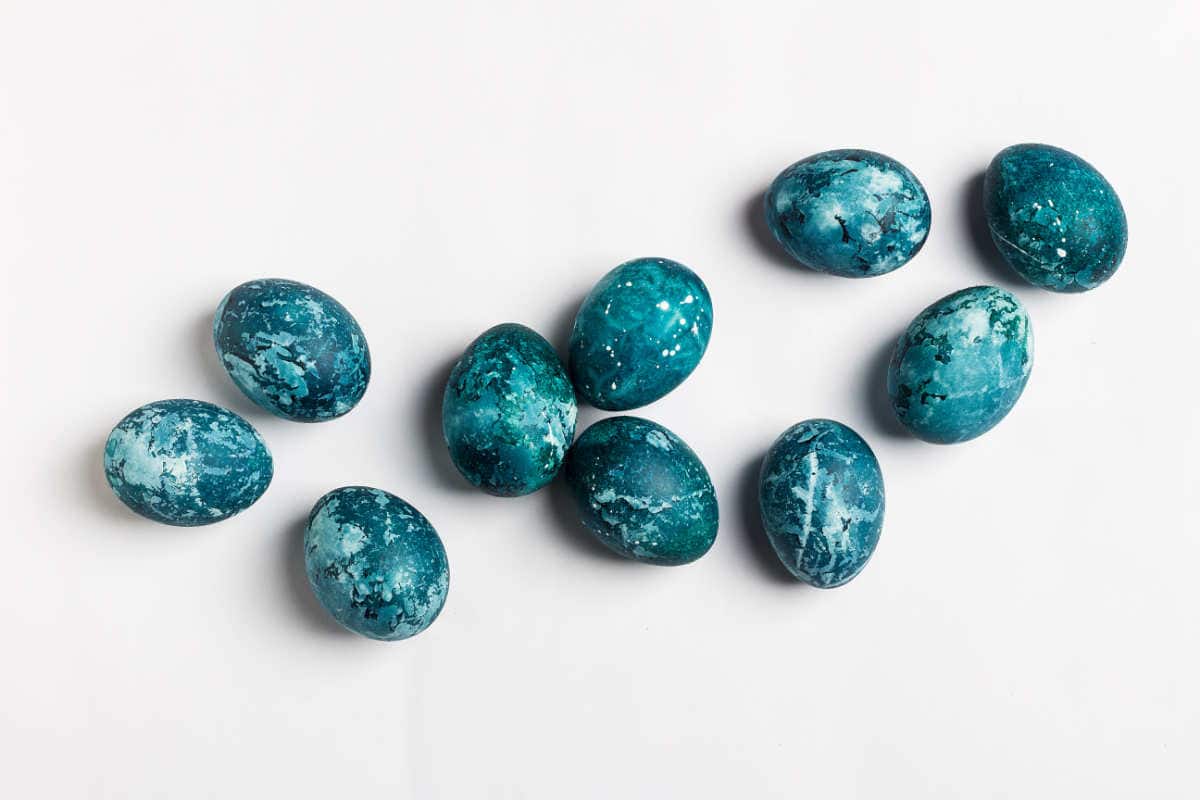
- Teal: For a vibrant Teal green, try using Red cabbage with vinegar. The magic lies in the acidity; add a splash of vinegar to the cabbage water before steeping your eggs.
- Blue: Red cabbage reigns supreme for natural blue dyes (don't add vinegar or baking soda, just plain cabbage water). The longer you simmer the cabbage, the deeper and more cobalt blue it becomes. Blueberries can also be used, though they may yield a more muted blue. Dried hibiscus flowers with no vinegar make an light to dark indigo blue.
- Purple: Combine Red cabbage with baking soda to create a vibrant purple dye bath. This method alters the acidity level of the cabbage water, resulting in a stunning purple color. Grape juice, blackberries and blueberries offer a delightful range of purples. Simmer your eggs in a concentrated solution for a beautiful, jewel-toned purple.
Mordants Double or Triple Your Rainbow
Mordants are substances that help dyes bind more permanently to the dyed materials, in this case eggshells.
While not strictly necessary, using a mordant like white vinegar, alum powder, or baking soda can enhance the color intensity and longevity of your natural dyes. They can also triple your color palette!
How Much Mordant To Use
General rule of thumb is 1 tablespoon of vinegar per 2 cups of dye bath, ½ teaspoon alum per 2 cups of dye bath, and ½ teaspoon baking soda per 2 cups of dye bath.
- Alkaline modifiers: Such as baking soda in your egg dye bath shift purples towards blue-greens, yellows & reds to pink. Red cabbage with baking soda or alum, give you teal eggs.
- Acidic modifiers: Such as white vinegar in your egg dye bath, keep colors that don't shift bright and set in deeper. Red cabbage with plain water gives you a light to deep cobalt blue. Red cabbage with vinegar to the red cabbage dye bath, and you get shades of purple.
Have fun experimenting with three bowls of each color, one with just a plain dye water bath, on with some vinegar in it, and the third with some baking soda or alum in it. Even if all three bowls are from the same dye bath, the three eggs will be different colors!
Tips For Natural Dyeing
While natural dyes offer endless possibilities, achieving vibrant colors requires a bit of know-how. Here are some helpful tips to ensure your natural egg-dyeing adventure is a success:
Natural dyes offer a unique and rewarding experience, but the process might differ slightly from using store-bought dyes. Here are some helpful tips to ensure vibrant and successful natural egg dyeing:
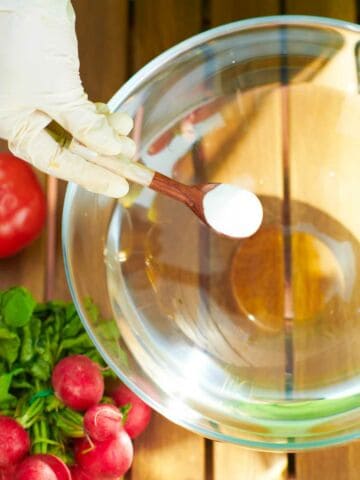
- Pre-soak your eggs: Soaking your eggs in a white vinegar solution for 30 minutes helps the dye adhere better, resulting in richer colors.
- Hard-boil your eggs: Always use hard-boiled eggs for dyeing. Freshly boiled eggs work best, as older eggs may not absorb color evenly.
- The longer, the bolder: For deeper and more vibrant colors, allow your eggs to soak in the dye bath for extended periods. Start with a few hours and adjust the time based on your desired color intensity.
- Experiment with mordants: Have fun using mordants to double or triple your egg dying color palette!
- Embrace the unexpected: Natural dyes can sometimes yield surprising results. Don't be afraid to experiment and embrace the unique hues that emerge!
- Experiment with color combinations: Create exciting new hues by combining different natural dyes. For example, simmering red cabbage with blueberries might yield a beautiful periwinkle blue.
- Let your creativity flow: Get creative with your dyeing techniques. Use rubber bands to create stripes, wrap leaves or lace around the eggs for patterned designs, or dip only half the egg for a two-toned effect.
Creating Masterpieces With Extra Techniques
Once you've mastered the basics of natural dyeing, explore these techniques to create stunning Easter egg designs:
- Rubber Band Resist: Wrap rubber bands around your eggs before dyeing to create resist patterns.
- Leaf and Lace Designs: Attach leaves or lace to your eggs with rubber bands before dyeing for beautiful natural imprints.
Adding Extra Touches
Once your eggs are beautifully dyed, you can add some extra pizzazz:
- Buff and Polish: For a shiny finish, gently buff your dyed eggs with a soft cloth or paper towel.
- Oil Rub: For a more lustrous sheen, rub a small amount of vegetable oil onto the eggs after drying.
- Embellishments: Get creative with embellishments! Use edible glitter, stickers, or even markers to add your own personal touch.
Safe and Sustainable Choice
- Natural dyes offer a safe and eco-friendly alternative to store-bought chemical dyes.
- They are non-toxic, making them perfect for families with young children who might be tempted to put the eggs in their mouths.
- Additionally, natural dyes are biodegradable and won't harm the environment when disposed of properly.
Additional Articles
- Dying Eggs With Onion Skins For Easter
- 15 Delicious Easter Brunch Buffet Ideas
- Instant Pot Hard Boiled Eggs
- Symbols of Easter - Bunnies to Lambs
Safety First
While natural dyes are generally safe, it's important to follow these precautions:
- Adult supervision: Always supervise children during the dyeing process.
- Food safety: Use utensils dedicated to dyeing and avoid using dyed eggs for consumption.
- Fresh ingredients: Use fresh ingredients for the best color results.
- Discard the dye bath: Do not reuse the dye bath for food purposes.
More Resources
- Natural Living Ideas: Natural Dyes: The Complete Guide (https://edibleindy.ediblecommunities.com/things-do/true-colors-creating-natural-food-dyes-home)
- Natural Dyeing with Plants: A Beginner's Guide to Using Natural Materials to Create Color by Brenda Anderson (https://www.amazon.com/natural-dyes-Books/s?k=natural+dyes&rh=n%3A283155)
- Almanac: How to Dye Easter Eggs Naturally (Chemical-Free and Dye-Free!) (https://www.farmersalmanac.com/celebrating-easter-natures-way)


Leave a Reply