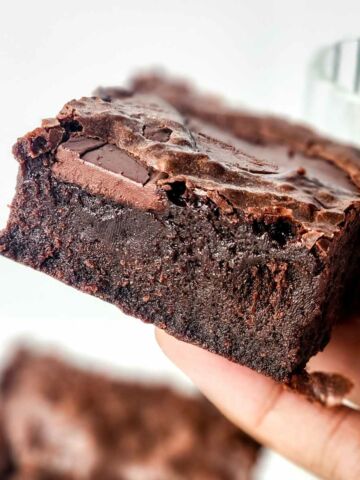
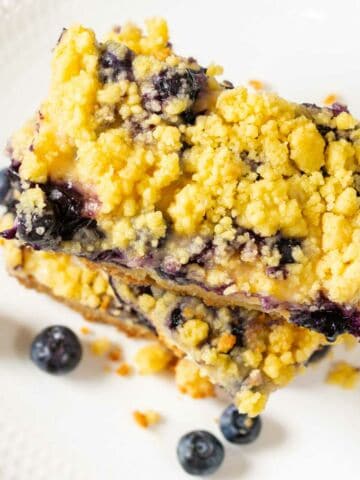
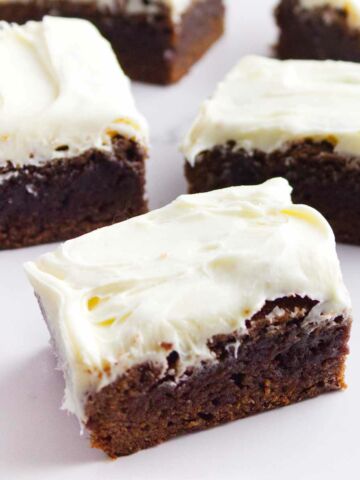
Looking for a festive and easy dessert to make for Fourth of July? These 4th of July Rice Krispy treats are perfect! Kids both young and young at heart will smile at these patriotic themed rice krispy treats.
These classic marshmallow & crispy rice cereal treats are sure to be a hit at your Independence Day barbecue!
We have a few more Independence Day themed recipes also. Try out German Puff Pancake for a berry delicious breakfast, or our Fruit & Cheese Platter that looks like the USA flag, or our Summer Berry Trifle to complete your Fourth of July themed event!

Why you will love this recipe
These rice crispy treats are simple to make and can be customized with any holiday colors. For Fourth of July just divide the recipe into thirds and make three mini batches using red and blue food coloring. They take just minutes to make, so don't forget to splash a bit of flour on your face after making them!
Jump to:
Ingredients
Use any crispy rice cereal to make these 4th of July themed treats. Use mini marshmallows or regular size marshmallows, both work great!

- crispy rice cereal
- marshmallows
- butter
- red food color
- blue food color
- patriotic themed cake sprinkles
See recipe card for quantities.
Full ingredient amounts and preparation instructions are in the printable recipe card at the bottom of this post.
How to make Rice Krispy Treats
You will essentially be making three mini batches of rice krispy treats instead of one large batch. We've done the recipe math for you already in our recipe card below. You can use the microwave also since these are mini batches.
Prepare a 9" x 13" pan by laying a sheet of aluminum foil or parchment paper across the long side with the ends hanging over. This will let you lift the entire batch of rice krispy treats out!
Be sure to also spray the foil or parchment lined pan with non stick spray. Have the pan ready before starting the steps below.
Full ingredient amounts and preparation instructions are in the printable recipe card at the bottom of this post.

Step 1. Make the red layer

Use a large microwave safe bowl and add the marshmallows and cubed butter.

Melt in the microwave for the time stated on the recipe card below. Add the red food color.

Stir in the red food color until blended.

Toss in the rice krispies and coat the krispy rice with the colored marshmallow mixture. Press into prepared pan.
Full ingredient amounts and preparation instructions are in the printable recipe card at the bottom of this post.
Step 2. Make the white & blue layers

For the white layer, repeat the process above except do not add any food colorant. Press into the pan on top of the red rice krispy layer.

Repeat a third time with the last of the butter & marshmallows, this time coloring the mixture blue. Spread on top of the uncolored "white" layer.
Full ingredient amounts and preparation instructions are in the printable recipe card at the bottom of this post.
Step 3. Finishing

Let the pan of rice krispy treats sit to cool. Press into the top layer your patriotic themed cake sprinkles.

Lift the slab out of the pan by pulling up on both ends of the aluminum foil or parchment paper.
Full ingredient amounts and preparation instructions are in the printable recipe card at the bottom of this post.
Step 4. Cut & serve

After the rice krispy treats are cooled, cut them into 12 rectangles or 24 smaller bars.
Full ingredient amounts and preparation instructions are in the printable recipe card at the bottom of this post.
Serving Suggestions
Hint: Using parchment paper or aluminum foil to line the baking pan will allow you to lift the entire batch out of the pan easily. Faster cleanup also!
Wrap these 4th of July Rice Krispy treats up individually so they pack well in summer camp lunch boxes too!

Substitutions
You can easily make these dairy free by substituting a non dairy 'butter' or margarine for the butter in this recipe. You can even use coconut oil instead of butter.
Variations
Try pressing in some red white & blue M & M's candies on the top of the pan of 4th of July Rice Krispy treats! Don't stir them into the warm mixture though, as the candy coating will melt and bleed color.
- Chocolate - use Cocoa Puffs instead of Rice Krispies, and regular marshmallows. Press in mini chocolate chips onto the top when cooled.
- Reeses - use peanut butter in place of the butter and press Reeses Pieces on the top when cooled.
- Rainbow - Use Pebbles fruity cereal instead of Rice Krispies. Use regular marshmallows, and press Skittles fruity candies onto the cooled surface.
Equipment
The baking pan fits this recipe for a batch half way up the pan. It will easily allow for a doubled recipe for taller bar also. The aluminum foil or parchment paper prevents the batch from sticking in the pan, and easier clean up!
Storage
You can freeze these as a slab, or individually wrapped for best results. They will stick together if you cut, stack, and then freeze though.
Tips for Success
- Double the recipe and make taller bars for an even more stunning presentation! The 9" x 13" pan will easily hold the doubled batch.
Frequently asked questions
Yes, but the gel food colorant is much more concentrated and you will need less.
Yes, but they may melt a little differently. If using vegan butter, peanut butter, or coconut oil, melt it separately from the vegan marshmallows, then blend the two together. This will prevent the vegan marshmallows from over cooking or seizing.
Most likely they will all be eaten before they have the chance of going bad. But you can keep them out on a counter for a few days. You can wrap them individually in plastic wrap and freeze them for up to 6 months.
Some Other Recipes We Are Sure You Will Love
Connect with Smells Like Delish!
Be sure to follow us on our social media accounts.
📖 Recipe
4th of July Rice Krispie Treats
Ingredients
- 15 oz marshmallows, divided
- 6 tablespoon butter, divided
- 7 ½ cups Crisp Rice Cereal, divided (Rice Crispies, Rice Krispies, any brand)
- red gel food colorant
- blue gel food colorant
Instructions
- Prepare your pan by either spraying it with non stick spray, or lining it with aluminum foil or parchment paper. Be sure to still spray the aluminum foil or parchment paper. The foil/paper allow you to lift the batch easily out of the pan for easy clean up. Set prepared pan aside.
- You will be dividing the cereal, marshmallows, and butter into three portions, one for each color. For each layer you will be placing 5 oz marshmallows and 2 tablespoon of butter into a large microwave safe bowl.15 oz marshmallows, divided, 6 tablespoon butter, divided
- For the red layer mix 5 oz marshmallow and 2 tablespoons butter into a large microwave safe bowl. Microwave 1 minute. Remove and mix well, then add the red gel colorant and mix in well. Return to the microwave for 15 additional seconds if needed, then add 2 ½ cups of the rice cereal mixture. Mix to coat the rice cereal and press layer into the prepared pan.7 ½ cups Crisp Rice Cereal, divided, red gel food colorant
- Repeat for the uncolored layer with 5 oz of the marshmallows, 2 tablespoons of the butter, and microwave in a large mixing bowl for 1 minute. Add the rice cereal and mix to coat with marshmallow mixture. Press into the pan on top of the red layer.
- Repeat again for the blue layer by melting the last 5 oz of marshmallows with the last 2 oz of butter in a microwave safe mixing bowl. Mix well, add the blue gel food colorant, and mix well. Return to microwave for 15 seconds if needed, mix and add the rice cereal. Coat the cereal and press into pan on top of the uncolored mixture.blue gel food colorant
- Let cool for 30 minutes to 1 hour until cool and set up. Cut into 12 large bars or 24 smaller bars.
Notes
- You will be basically making three separate small batches. You have plenty of time to just wash out the mixing bowl in between color layers. This will reduce your clean up time.
- Spray the large mixing bowl and the mixing spatula with non stick spray for easy pouring into the pan.
- Spray your hands with non stick spray to make pressing each layer easier, and less mixture sticking to your hands.
- Double your recipe so that the entire pan is filled to the top, with each layer twice as thick.
Nutrition
Like this recipe? Be sure to share it, pin it, or add it to your collection!
Leave a Reply