

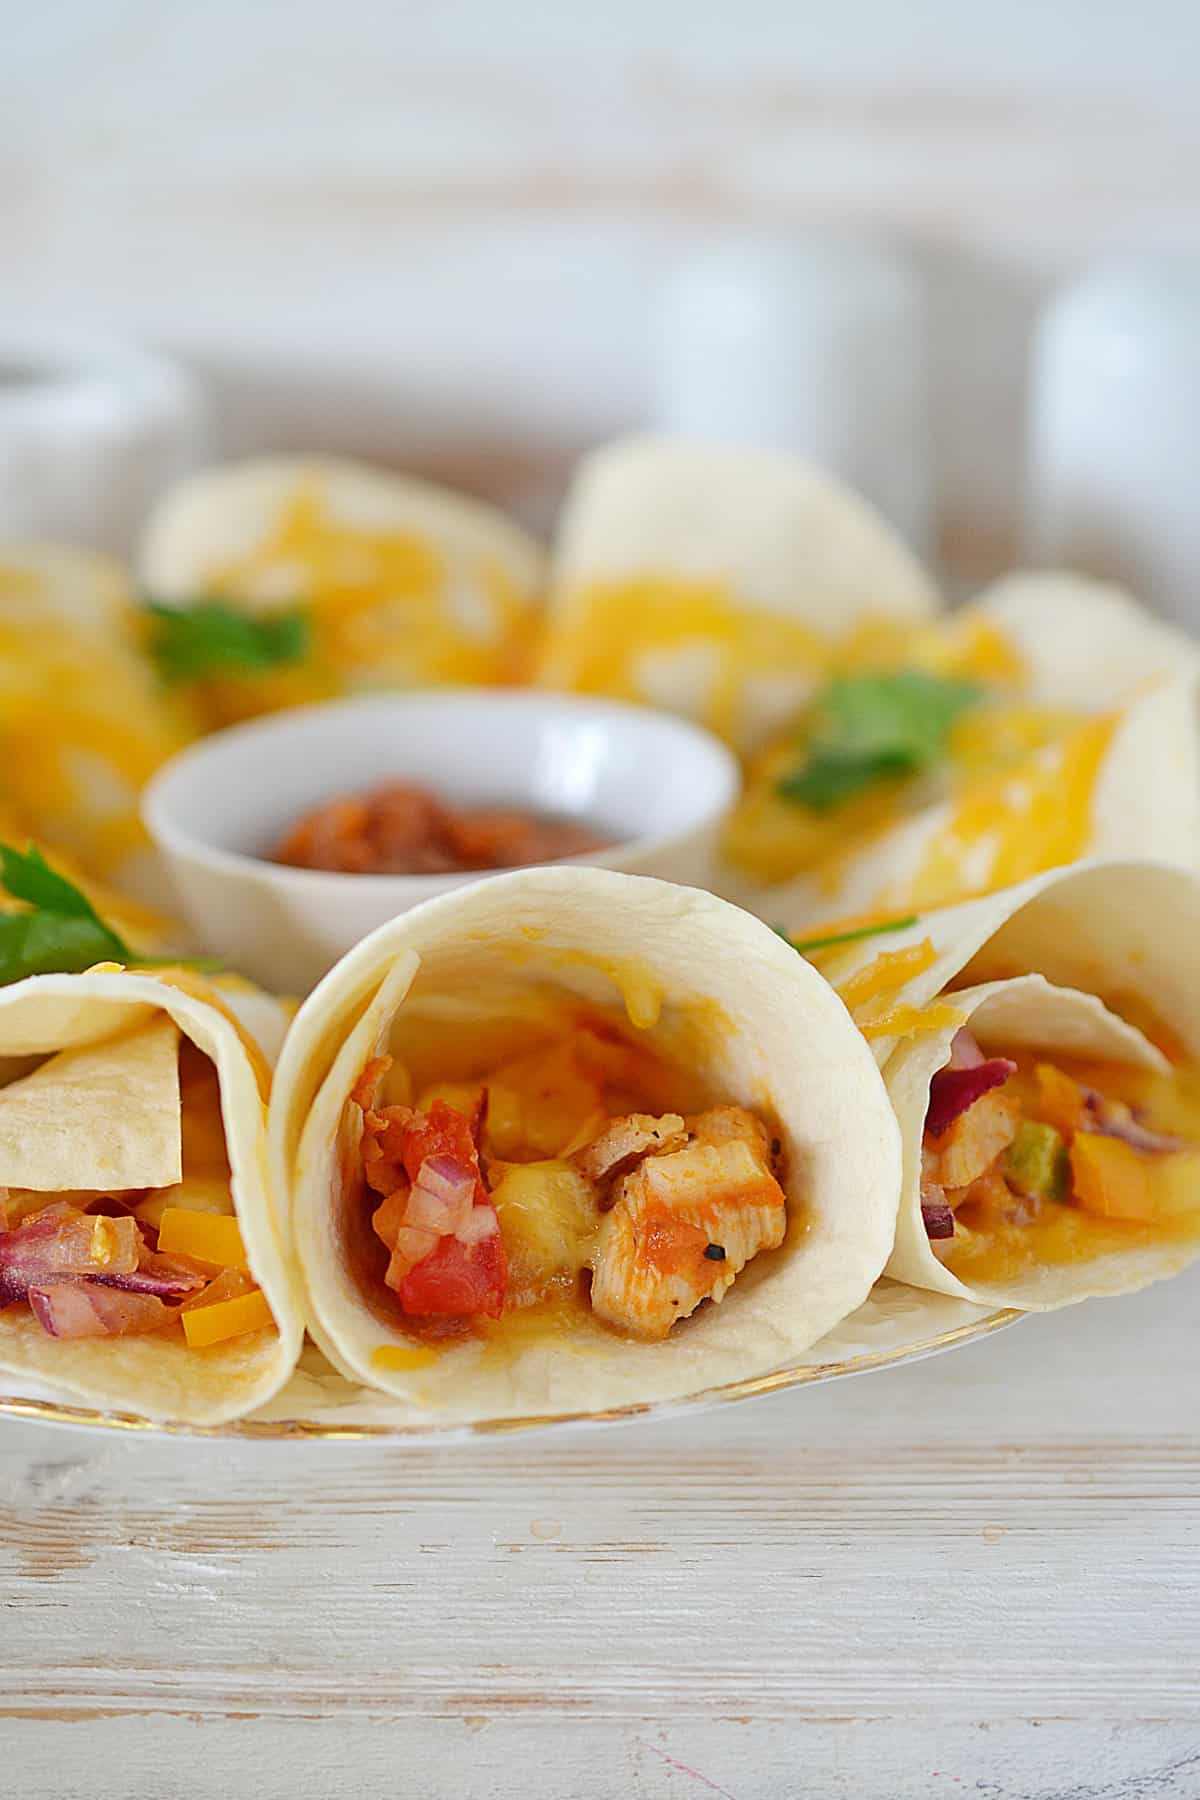
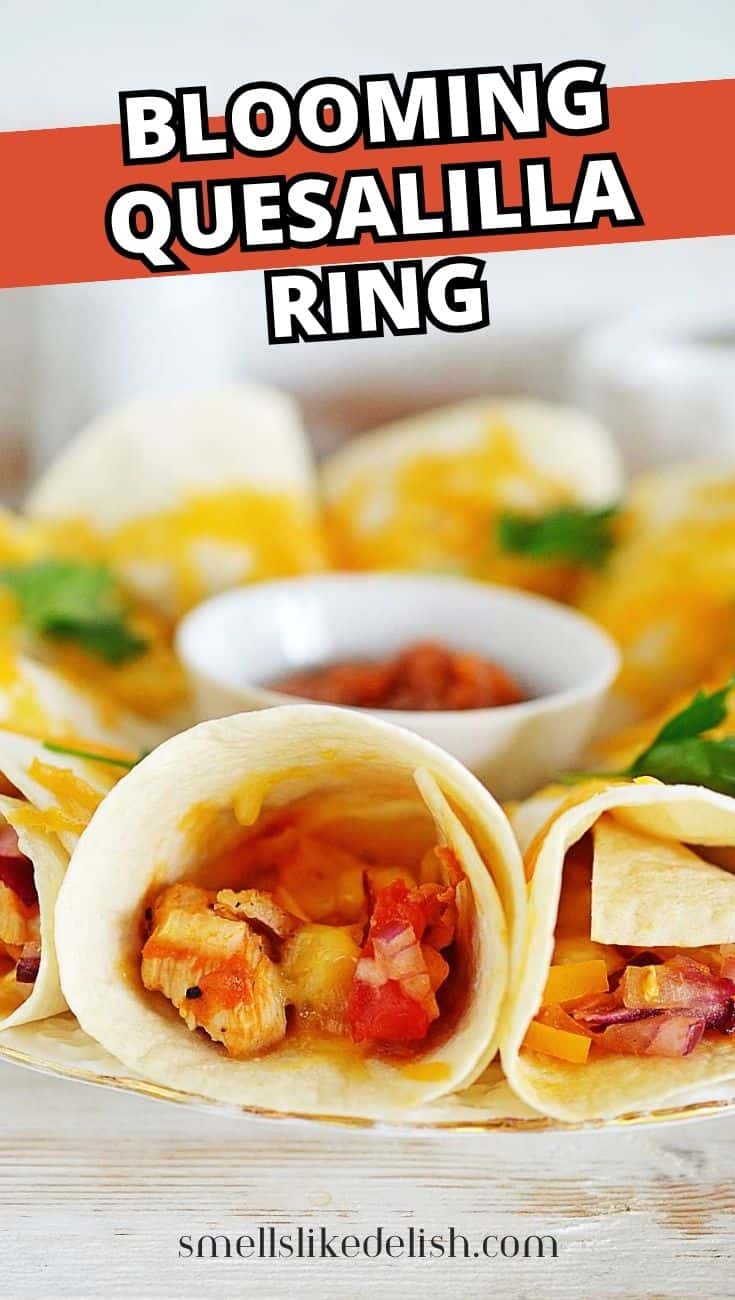
This blooming quesadilla ring is a cheesy pull-apart appetizer that is easy to make with rotisserie chicken. Bake it with melty cheese on top, then serve it warm with your favorite dip in the center.
Why You'll Love This Blooming Quesadilla Ring Recipe
This pull-apart quesadilla ring turns cooked chicken, cheese, salsa, and flour tortillas into an appetizer that looks fun on the table but is still easy to assemble. Rotisserie chicken keeps the filling fast, and the melty cheese on top helps hold the ring together as it bakes.
- Easy party appetizer: The filled tortilla cones bake together in a ring, so guests can pull apart one piece at a time.
- Rotisserie chicken shortcut: Cooked chicken makes the filling faster and keeps this recipe simple for entertaining.
- Melty cheese finish: Shredded cheese goes inside the cones and over the top so the ring bakes up warm, cheesy, and ready for dipping.

Ingredients Overview
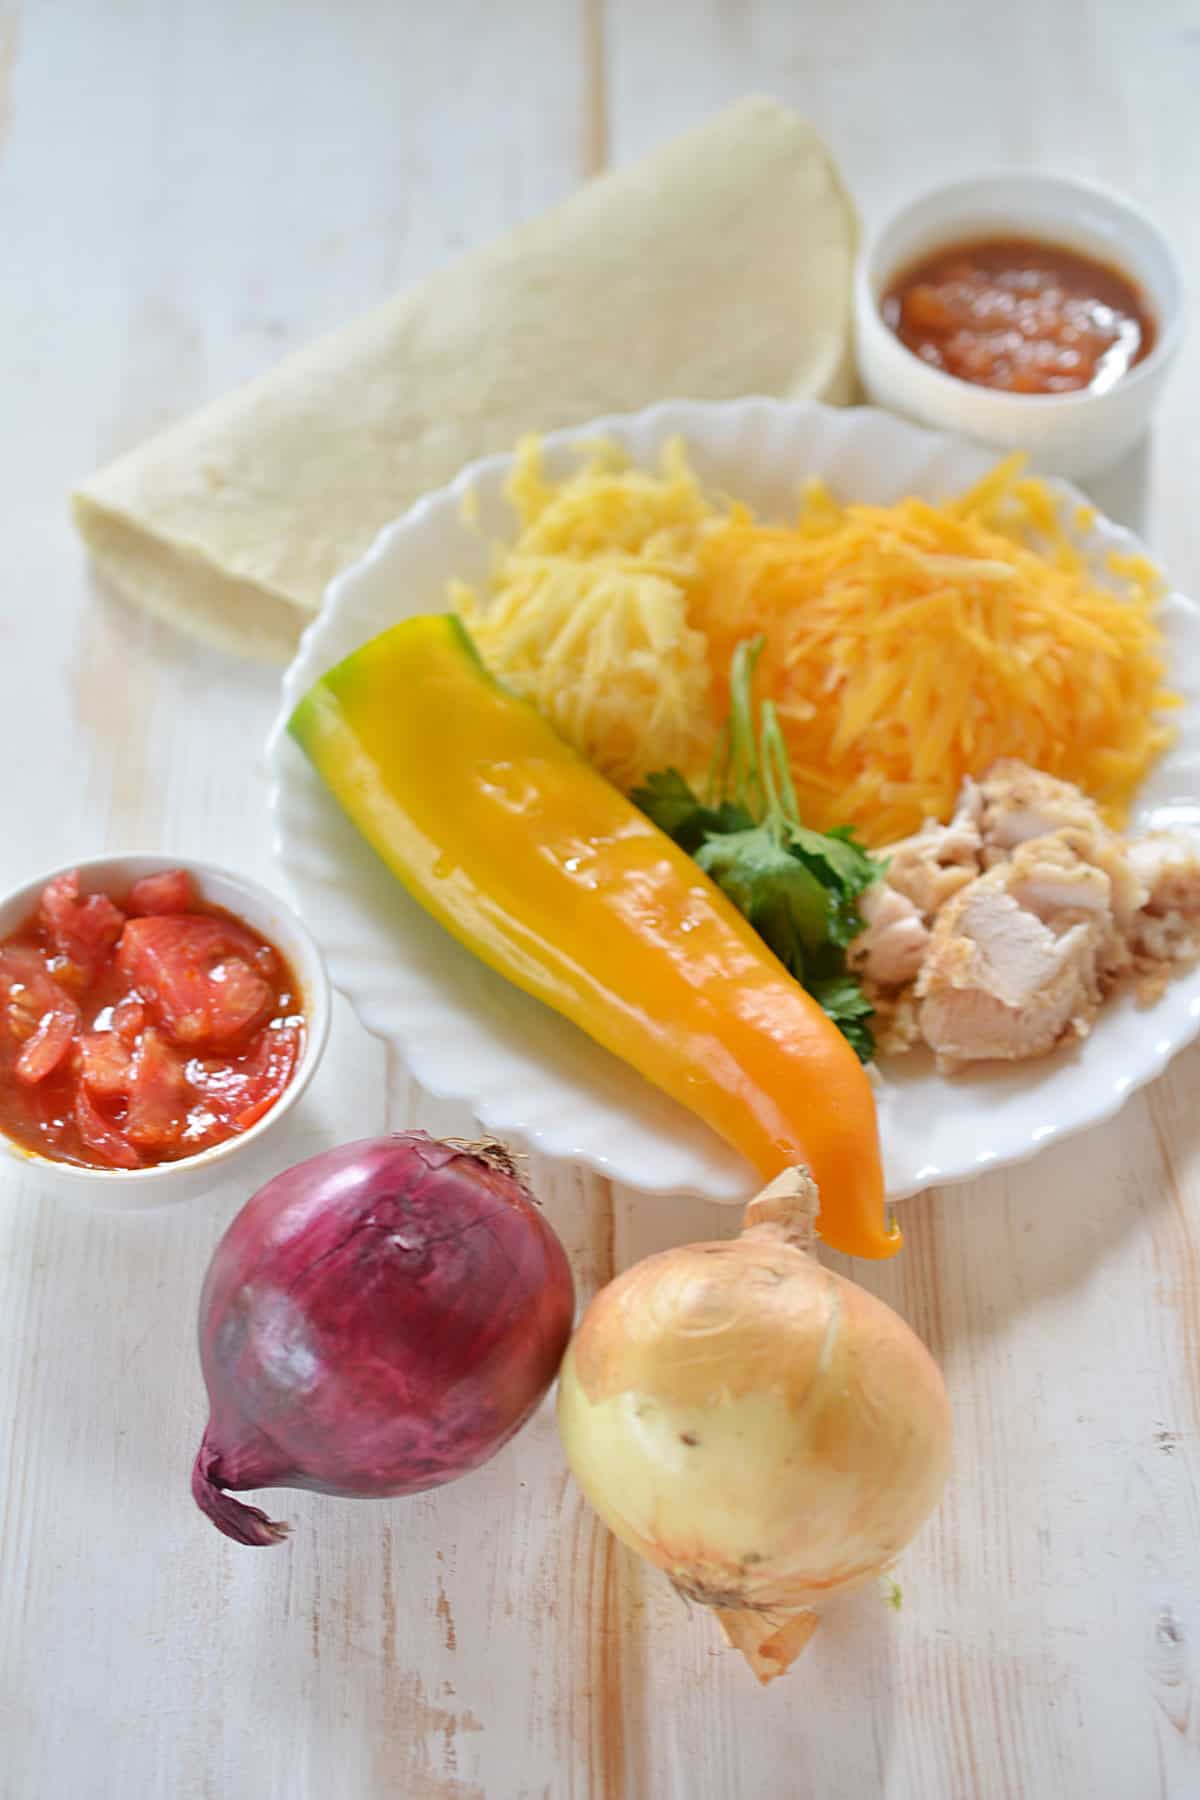
Cooked chicken, flour tortillas, shredded Mexican cheese blend, salsa or pico de gallo, peppers, onions, tomato, and cilantro make up the filling and ring. Rotisserie chicken is the fastest option, but leftover cooked chicken works too.
Soft flour tortillas are the best choice because they roll into cones without cracking. After baking, add a small bowl of pico de gallo to the center for dipping.
Full ingredient amounts and preparation instructions are in the printable recipe card at the bottom of this post.
How To Make A Blooming Quesadilla Ring
The filling is mixed first, then tortilla halves are filled, rolled into cones, and arranged in a circle with the pointed ends facing the center. The step-by-step photos below show how the ring takes shape before baking.
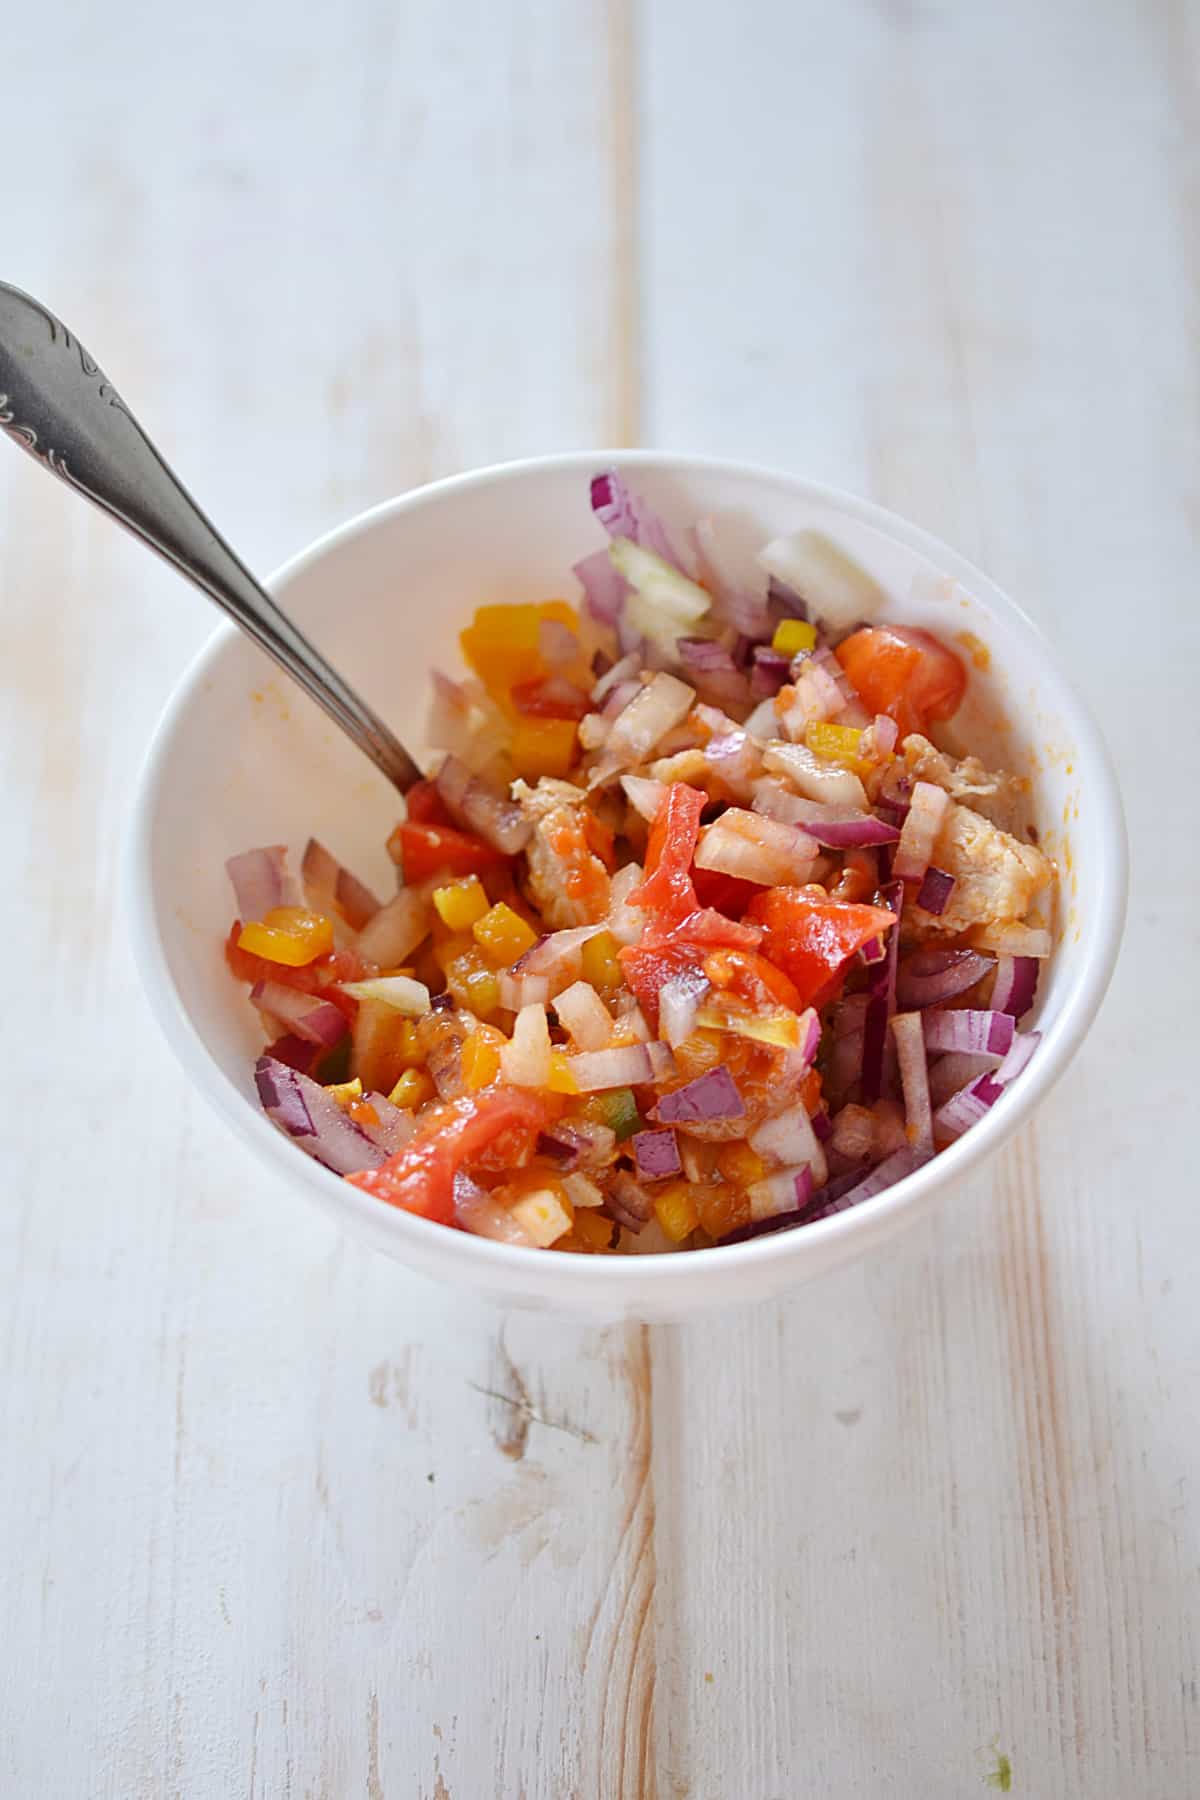
Step 1: Dice the red onion, green onions, tomato, cilantro, peppers, and cooked chicken. Add everything to a bowl with the salsa and mix the filling together.
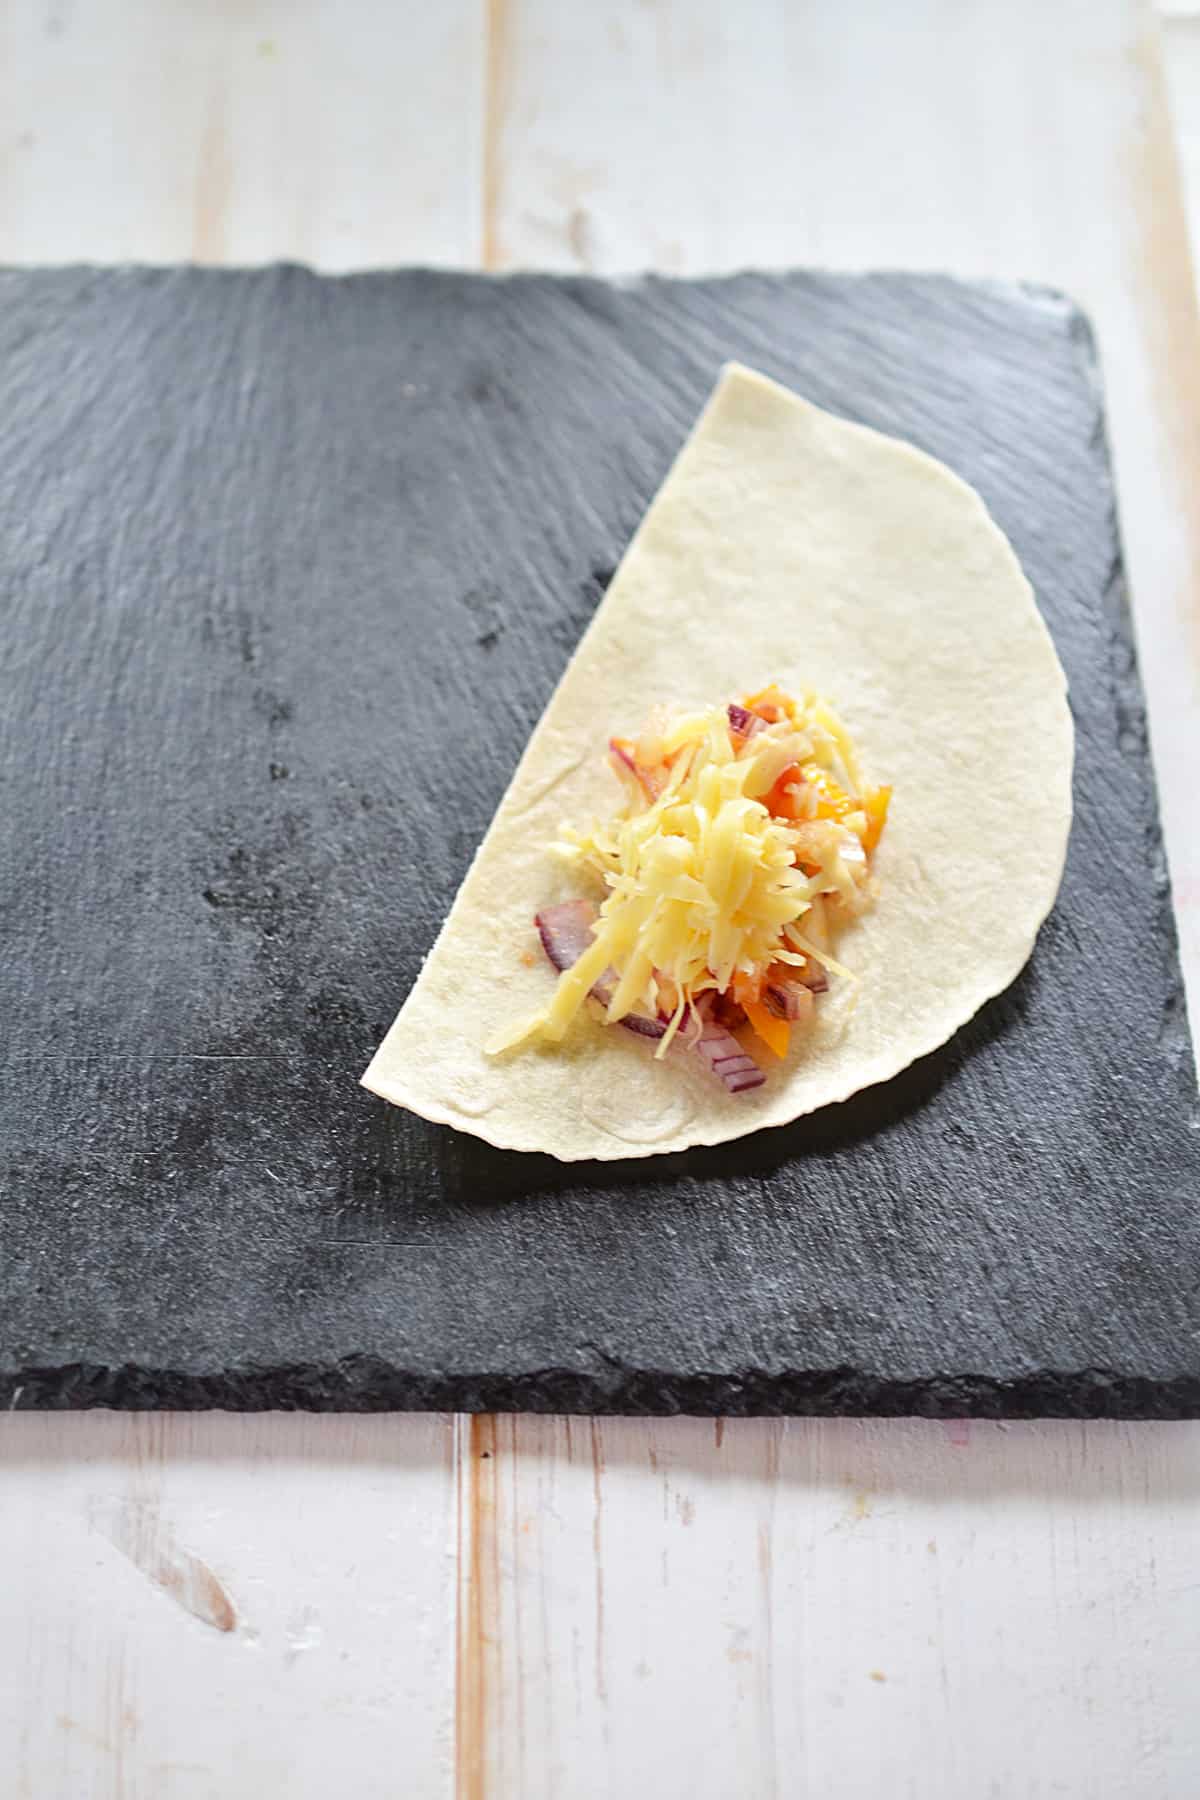
Step 2: Cut the tortillas in half. Place a spoonful of filling and some shredded cheese on one end of each tortilla half, then roll each one into a cone.
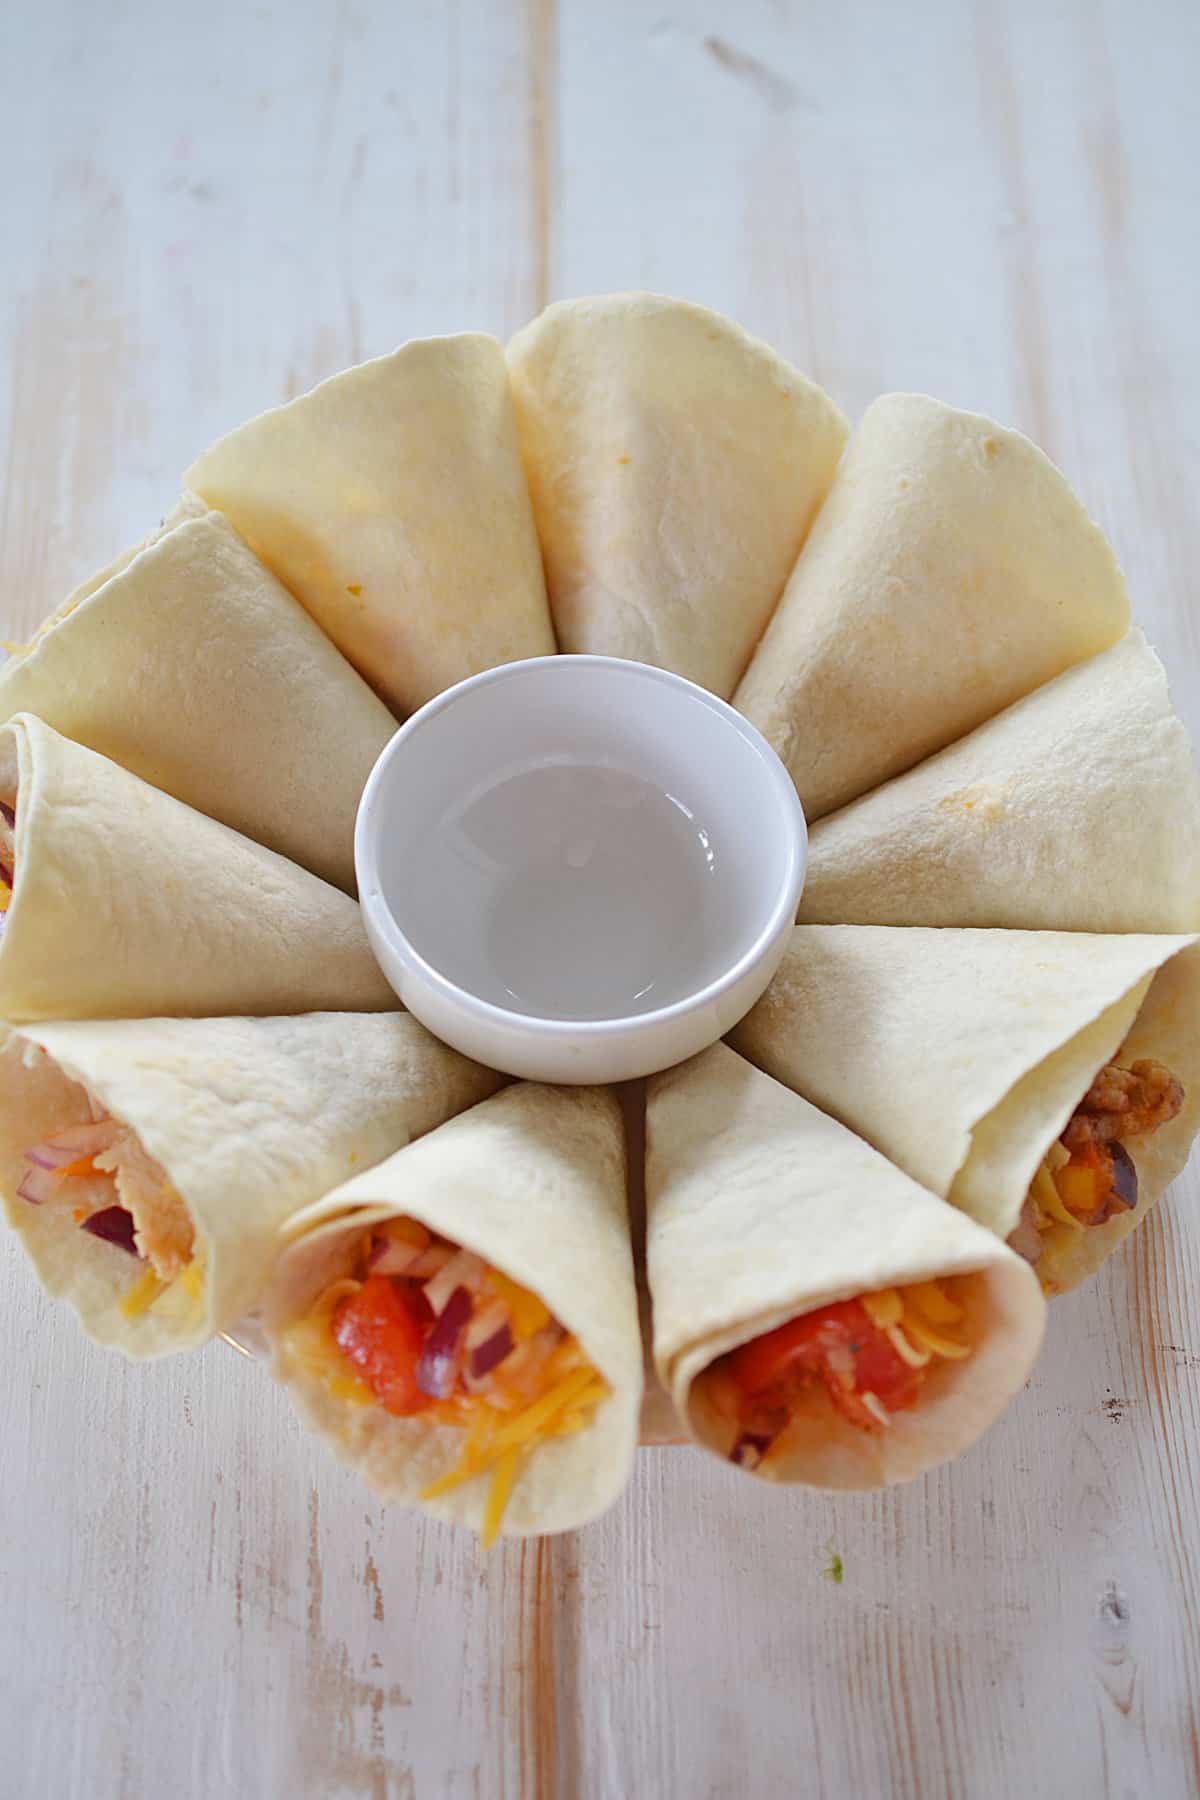
Step 3: Arrange the cones in a circle on the oven-safe platter or pizza pan, with the pointed ends facing the center. Fit the cones snugly so the ring holds its shape.
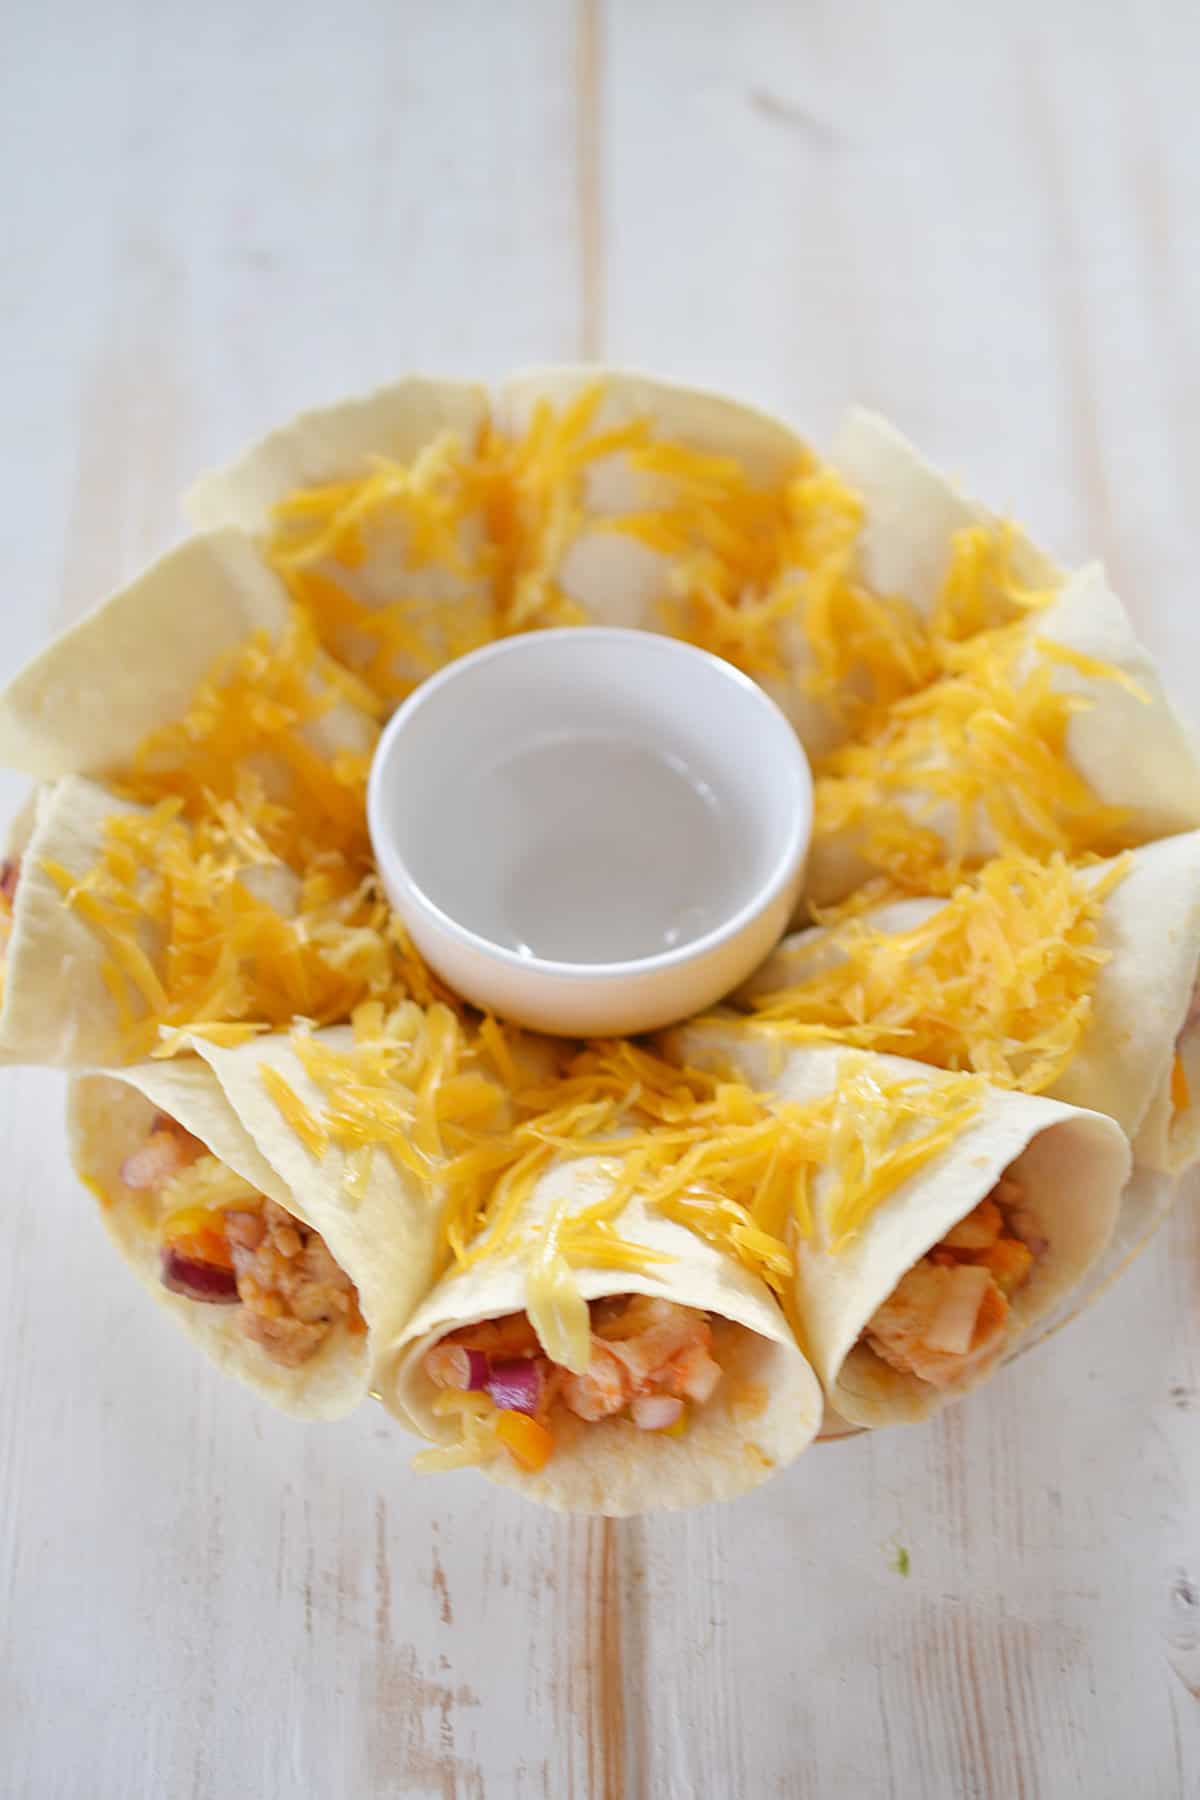
Step 4: Sprinkle the remaining cheese over the quesadilla ring. Bake until the filling is hot and the cheese is melted, about 20 minutes. Garnish with cilantro if you like, and serve with salsa in the center.
Pro Tip
Place the center dip bowl after baking so it holds the ring in place without getting too hot in the oven.
Serving Suggestions
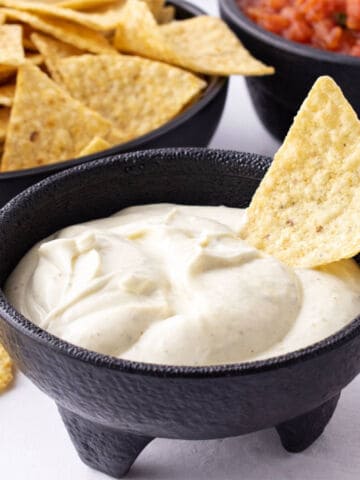
Serve this blooming quesadilla ring warm as a pull-apart appetizer for game day, Cinco de Mayo, movie night, or casual parties. Fill the center bowl with pico de gallo, sour cream, or Mexican white sauce.
For extra toppings on the side, add pickled jalapenos, pickled onions, tortilla chips and guacamole. It also fits well on an appetizer table with other finger foods.

Substitutions and Variations
Here are a few easy ways to adjust this blooming quesadilla ring:
- Use rotisserie chicken: Shredded rotisserie chicken is the fastest option and works well with the salsa and cheese filling.
- Use leftover turkey: Cooked turkey can replace the chicken, especially after a holiday meal.
- Change the cheese: Mexican cheese blend, Monterey Jack, cheddar, or pepper Jack all melt well in the tortilla cones.
- Add more heat: Mix in diced jalapenos, use hot salsa, or serve pickled jalapenos on the side.
- Change the dip: Fill the center bowl with salsa, guacamole, pico de gallo, avocado crema, sour cream, or Mexican white sauce.
Tips for Success
A few small details make the cones easier to roll and serve.
- Use soft flour tortillas: Soft tortillas roll into cones more easily and are less likely to crack.
- Do not overfill: A spoonful of filling and a little cheese is enough for each tortilla half, or the cones will be hard to close.
- Point the cones inward: Keep the pointed ends facing the center so the ring forms a clean flower shape.
- Fit the cones snugly: A tight ring helps the quesadilla cones hold together while baking and serving.
- Add the dip bowl after baking: The bowl helps hold the center open and gives guests an easy dipping spot.
Storage Options
This appetizer is best served warm shortly after baking.
- Refrigerate leftovers: Store leftover quesadilla cones in an airtight container in the refrigerator for up to 2 days.
- Reheat gently: Warm leftovers in a 200°F oven or air fryer until heated through. The tortillas will be softer after refrigeration but should still taste good.
- Do not freeze: Freezing is not recommended because the fresh tomatoes, peppers, onions, and salsa release moisture as they thaw, which can make the flour tortillas soggy.
- Keep dips separate: Store salsa, guacamole, sour cream, and other dips separately so the tortillas do not soften faster.
Related Recipes
Frequently Asked Questions
Yes. Assemble the quesadilla ring a few hours ahead, cover it tightly, and refrigerate it until you are ready to bake. Add the center dip bowl after baking, not before.
Do not overfill the tortilla halves, and arrange the cones snugly with the pointed ends facing the center. The melted cheese and neighboring cones will help hold each one in place.
Flour tortillas work best because they are softer and roll into cones more easily. Corn tortillas are more likely to crack unless they are very warm and flexible.
Yes. Replace the chicken with black beans, refried beans, fire roasted corn, or extra peppers and onions. Keep the filling thick enough that it does not leak out of the tortilla cones.
Cinco de Mayo Recipes


Get The Recipe!

Blooming Quesadilla Ring
Equipment
- Round Oven Proof Platter or
- pizza pan
Ingredients
- 1 lb chicken breast halves about 2 halves, cooked (or use a rotisserie chicken)
- 1 medium red onion chopped
- 6 green onions sliced
- ½ medium yellow bell pepper or green
- ½ medium red bell pepper
- ½ large fresh Poblano chile optional
- 1 medium diced tomato diced
- ¼ cup chopped cilantro
- ¼ cup salsa or pico de gallo
- 20 flour tortillas store or homemade
- 2 cups grated Mexican cheese blend divided in half
Instructions
- Preheat the oven to 250℉.
- Dice the red onion, green onion, tomato, some cilantro (optional), and peppers. Dice up the chicken. Add it all to a bowl. Add the salsa and mix up the quesadilla filling.1 lb chicken breast halves, 1 medium red onion, 6 green onions, ½ medium yellow bell pepper, ½ medium red bell pepper, ½ large fresh Poblano chile, 1 medium diced tomato, ¼ cup chopped cilantro, ¼ cup salsa
- Cut all the tortillas in half. Place a couple spoonfuls of the filling on one end of the tortilla. Add some of the grated cheese. Roll up into a cone shape and place on the place with the pointed end of the cone in the center of the plate.20 flour tortillas, 1 cups grated Mexican cheese blend
- Repeat filling and rolling into cones with all the tortillas. As you go around the outside of the plate, you will see the blooming flower take shape. Gently fit as many of the quesadilla cones in place so they are firmly in place.
- Spread the remaining grated cheese on the top of the quesadilla ring. Bake in the preheated oven about 20 minutes, or until the cheese is melted and the quesadilla ring is heated up. Garnish with some chopped cilantro, if desired.1 cups grated Mexican cheese blend
- After baking, place a small condiment bowl in the middle to hold the quesadilla ring in place. Fill the bowl with your favorite topping.
Notes
- Use soft flour tortillas: Soft tortillas roll into cones more easily and are less likely to crack.
- Do not overfill: A spoonful of filling and a little cheese is enough for each tortilla half, or the cones will be hard to close.
- Point the cones inward: Keep the pointed ends facing the center so the ring forms a clean flower shape.
- Fit the cones snugly: A tight ring helps the quesadilla cones hold together while baking and serving.
- Add the dip bowl after baking: The bowl helps hold the center open and gives guests an easy dipping spot.
Nutrition
Pin It For Later ⤵


Anonymous says
Delicious, I'm making this again!